

Yesterday we had our Poshta Design Pre-Christmas in July Celebration with the gingerbread Mr. and Mrs., and today we're featuring the house they live in!

This Gingerbread Village Kit comes in a cute little bag that contains every single thing you need to make these gingerbread house ornaments! I put this to the test, as we left for Ohio State's orientation earlier this week and I wanted to work on these in the 6 hour car ride. What a LUXURY grabbing this bag and not needing to think of what other supplies I'd need to gather (undoubtedly forgetting something). Aside from the die cut machine and a pair of scissors, it's a confirmed grab-n-go kit. Even the needles are provided!
Let's take a closer look!

The beauty of this kit is that it comes with so many different details you can add to customize your house. There is even a guide with different ideas/formulas laid out. I loved one of the ideas so much I copied it almost exactly.
The six-panel door is a cute way to add a lot of stitching details. You can totally dress up the door further by hanging a heart, a wreath, a candy. A seed bead is added for the door knob, also included in this kit.

Flanking the door are two candy canes. I think it's cute how the stripes are added to the main cane. I stitched them on with a coordinating white floss, and then stitched the two canes together with a coordinating red floss.

Over the door is a cute swirl of icing that I've used a stem stitch on to make it more thick and pronounced.

A tiny heart is cozy in the "attic" of the house.
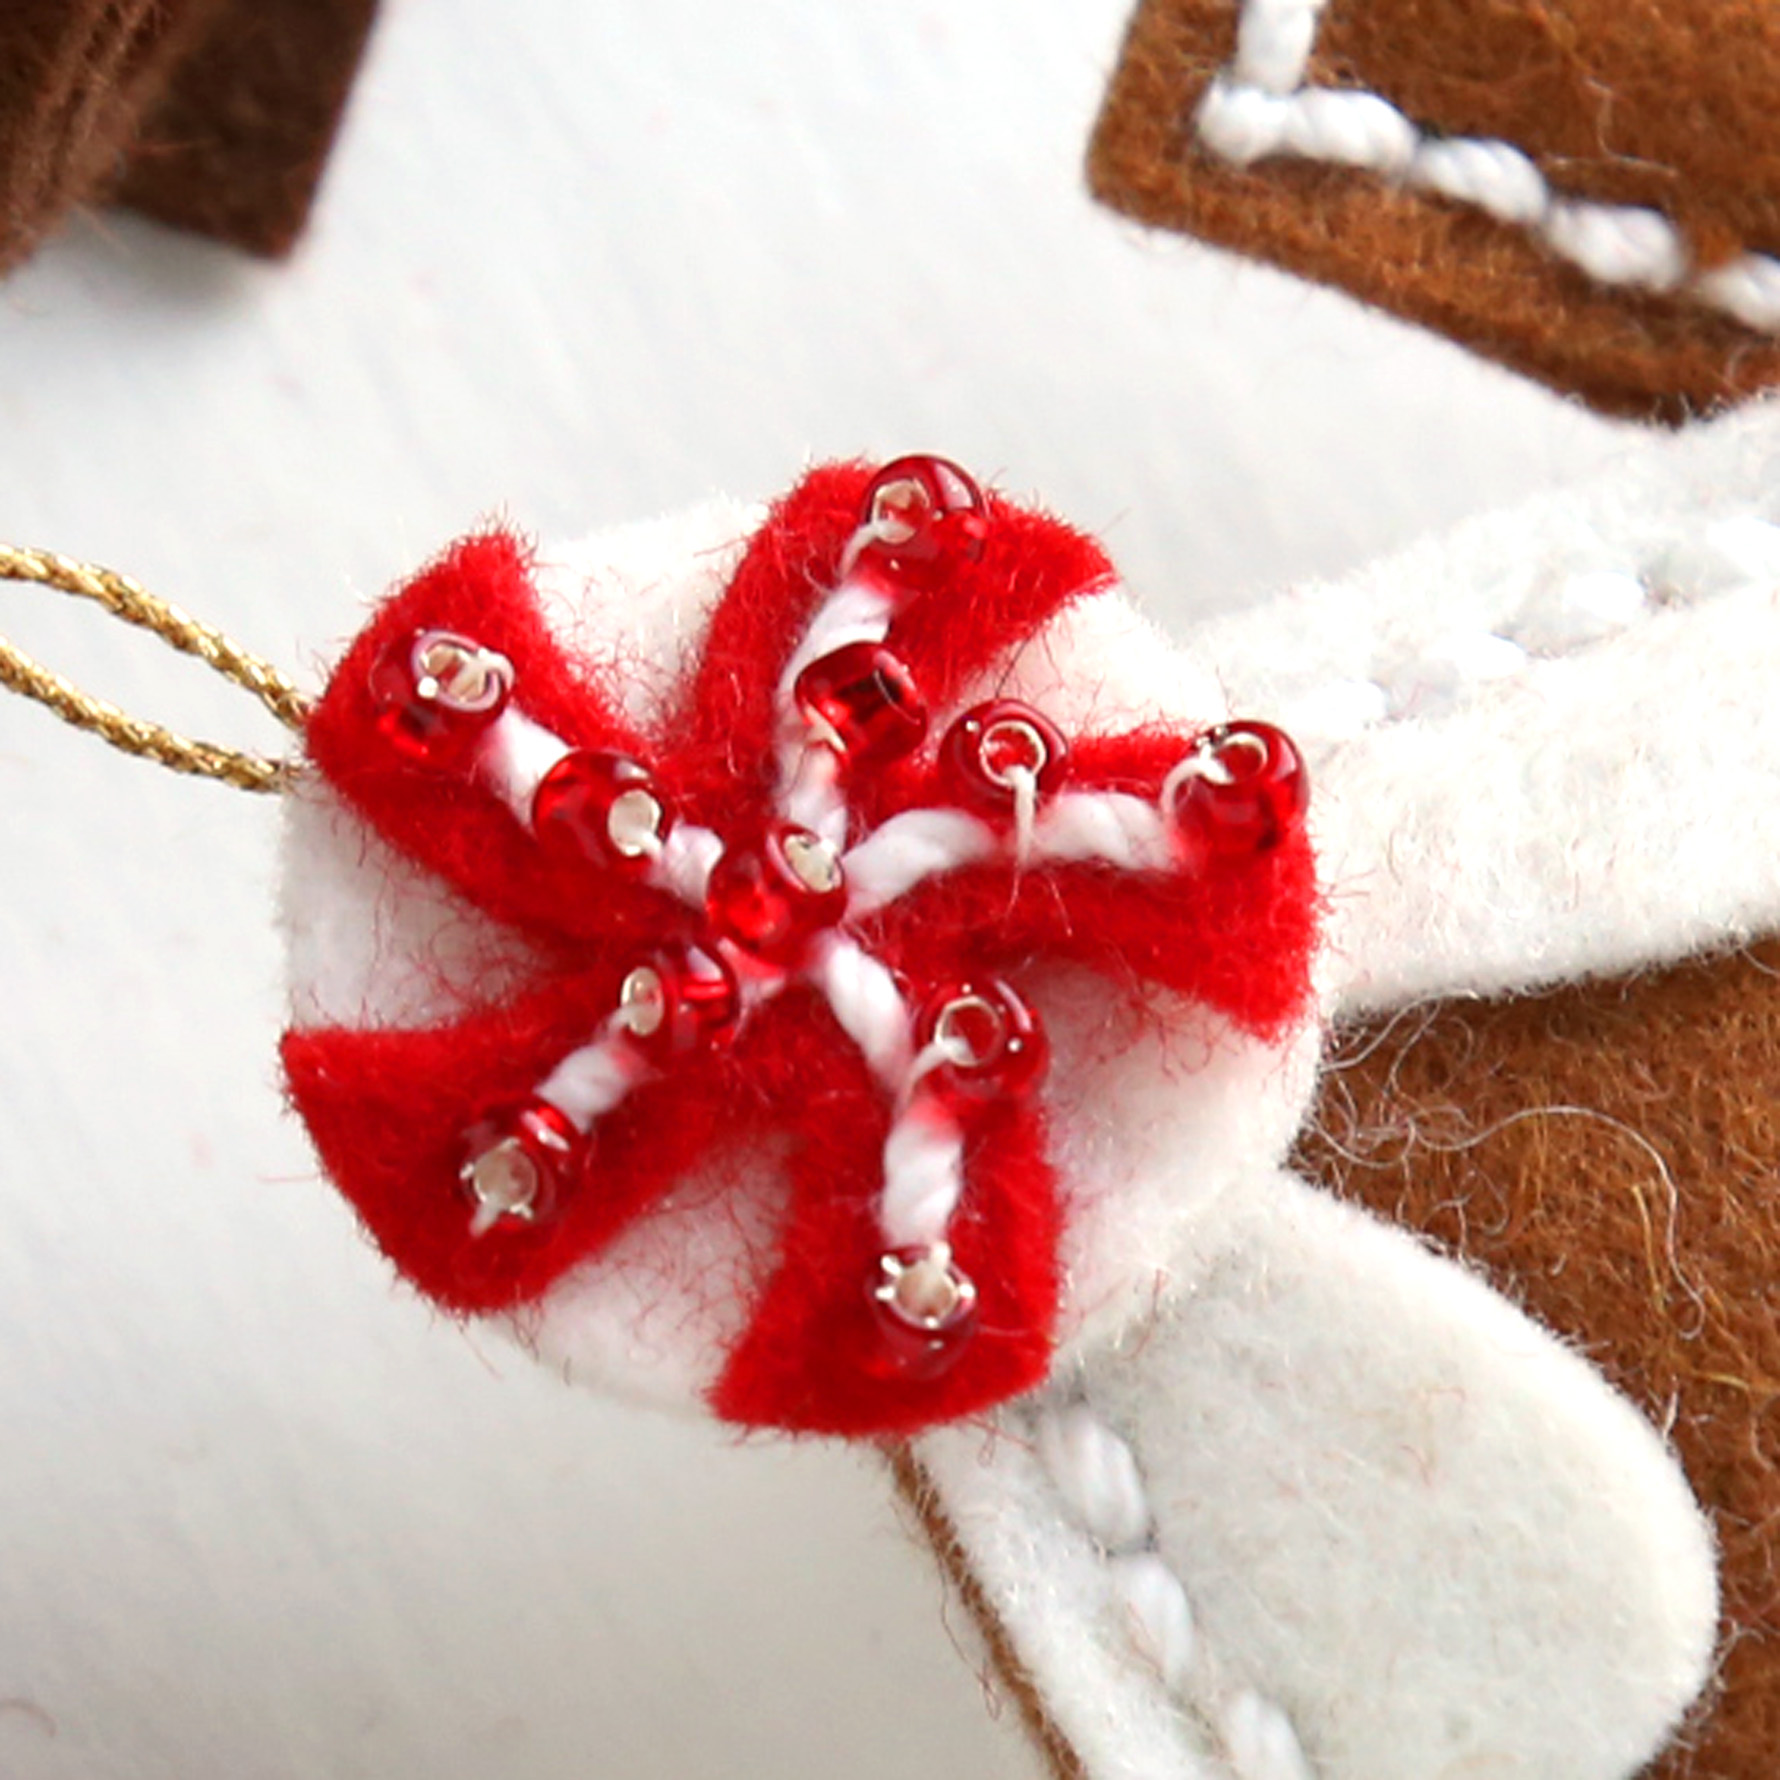
And then the classic peppermint candy in the peak of the roof is a great way to balance out the top. I've added a few seed beads here to introduce a little sparkle. This candy also turned out to be a great way to add the looped hanger to the top, as I neglected to add that to the house before sewing the two pieces together.

Cut two icing sections for along the roof line. Another tip: you may want to use a blunt needle so it will easily glide into the established holes. The sharper the point of the needle, the more chance it goes thru the felt somewhere other than the intended die cut hole.

Now that the front is done it's time to think about the back of the house!

I used another example from the included guide and plotted space for two shuttered windows and a wreath.

Those shutters are so darn cute, and add a nice dimension when they are folded out! For a smoother look I made one large stitch down the middle and across each window, instead of stitching thru all the holes like the front door.

The wreath has uniform holes cut out for you to make a giant zig-zag stitch around the wreath. I probably could have stitched that in coordinating green floss, but I just have random red french knots for berries.

Now that you're finished with decorating the front and back of the house, it's time to connect them together. I used a stem stitch, so the back has a thick icing look.
Before connecting the house panels though, here are a few tips:
- Add a looped hanger to front or back of the house,
- Add the stuffed chimney to the front or back of the house,
- Make sure all the ends from the embellishments are secured,
- Look for places to add some sparkle with seed beads

This Gingerbread Village, along with the Gingerbread Friends, will be released at Poshta Design on Saturday 7/2 at noon EST.
Prizes!
There will be a $50 gift certificate giveaway for both introductory blog
posts at Poshta Design. Winners will be chosen from comments on each
post, and announced at 9am on Saturday 7/2.

Here's more information on the kit, from Lizzie herself:
Retails for $100.
Homespun Holiday: Gingerbread Village Contents
27-piece die set
zippered project bag
2 all-purpose needles
handy needle storage tube
printed inspiration guide for easy reference
exclusive access to inspirational instruction videos
5 yards of white crochet thread
3 rolls of 5" x 36" felt in Walnut, Gingersnap, and Tundra
one 5" x 6" panel of Cardinal felt
one 5” x 6” panel of Arugula felt
5 skeins of embroidery floss
4 colors of seed beads
2 colors of sequins (in two sizes)
compartmented bead storage container
Thanks so much for stopping by!
-Kelly
Your creations are just so sweet. I love all of the details. I am so in love with this set, I can imagine coming up with even more details to make each one specifically for different recipients. Thank you for your wonderful ideas.
ReplyDelete