Friday, June 4, 2021

Altenew Adventures Ahead Stamps/Dies/Stencils/More Collection Release Blog Hop + Giveaway

Hello Friends! Welcome to the Adventures Ahead Altenew Blog Hop featuring timely images of fun, travel and escape ... all things I hope to be enjoying in the summer of 2021!

You may have come from the blog of Laurie Willison, but if not feel free to start at the beginning with the Altenew Blog.


These first two cards feature the Enjoy your Journey Stamp Set which has detailed illustrations of romatic travel ... steamer trains, bridges, trunks, cameras, and plenty of sentiments.

Like the ink blending on the backgrounds?! Someone else has done all the work, as I've used two different sheets of paper from the Dreamy Sunset 6x6 Paper Pack to spotlight these awesome images!

With images this detailed, coloring does not need to be too involved. After fussy cutting out the train and tracks, I used several gray copics to color different parts of the engine, and then blended some sepia-toned ink on the tracks to go with the patterned paper, and the vintage feel. 

Love how dreamy the color blending in this backgroud paper is!


Similar concept for this one, I used a patterned paper from the Dreamy Sunset 6x6 Paper Pack and fussy cut the main image to adhere on top.

Also like the last card, I used a few different grays to color the mountains and bricks, but left the rest uncolored. The trail of steam coming from the engine is on foam tape to make it stand out.

The other set I'm in love with from this release is the Up and Away Stamp Set. It makes two different hot air balloons, has a sweet couple watching them, and several sentiments to pick from. 

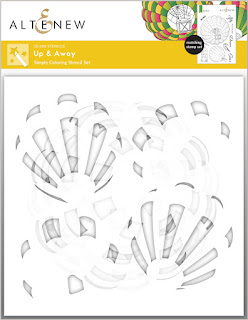
The best part of this set, however, is the Up and Away Coloring Stencil! It is SO MUCH FUN to see all the different color combinations you can come up with. And it's ridiculously easy to sponge on the different colors. In seconds you have beautifully colored balloons!

The large balloon is big enough to have several different placement options on a standard A2-sized card. Position it in the center, top, left. right, etc., all for different looks. If you place it on the top right corner, you can also add the cute couple in the foreground to watch it. 

Stencil a hill for them to stand on, and add a sentiment to finish the card.


Here's an option on the left with the larger balloon in the center of the card. You can see how it takes up the space nicely.

The card on the right features the smaller balloon x 2. If you want more focus to be on the balloons vs. the couple, don't forget that you can use only a portion of the couple. Instead of using the full body die cut, I just have the upper torsos here. The sentiment fits nicely between the couple and the balloons.


Finally, with the Up and Away Die Set, the large hot air balloon is begging to be made into a shaped card. For this coloring scheme, I had the darker two colors on the same vertical column. I like how that makes long vertical stripes on the balloon. The next balloon I make I'll have the two darker colors on the same horizontal row, to make horizontal stripes.


Perfect size for a shaped card!

Free Gifts

Here are THREE ways to get a FREEBIE to kickstart your creativity! Free gift will be added to cart automatically. 

  • Get a FREE brand new Adventures Ahead Release Inspiration Guide (worth $5.99) with every order of high-value Exotic Garden release bundles. Shop HERE! *Exclusions apply.

  • Get a FREE brand new Creative Jump Start Class with every order from the new Adventures Ahead release collection from 6/04/2021 through 6/10/2021. Shop HERE

  • Get a FREE brand new Adventures Ahead Release Mini Inspiration Guide with every order from 06/04/2021 through 06/06/2021. Shop HERE!

Giveaway Prizes

$300 in total prizes! To celebrate this release, Altenew is giving away a $50 gift certificate to 2 lucky winners and a $25 gift certificate to 8 winners! Please leave a comment on the Altenew Card Blog and/or each designer’s blog post on the blog hop list below by 06/09/2021 for a chance to win. 

Altenew will draw 10 random winners from the comments left on each stop of this blog hop and announce the winners on the Altenew Winners Page on 06/11/2021.


I am now pleased to send you to the amazing Agnieszka MaƂyszek who has some beautiful projects to share with you! 

Thanks so much for stopping by!
-Kelly


Supplies Used (affiliate links used, thanks so much for your support!)

Enjoy your Journey Stamp Set

Up and Away Stamp Set

Up and Away Die Set

Up and Away Coloring Stencil

Dreamy Sunset 6x6 Paper Pack
 

Tuesday, May 25, 2021

Proud to be American; Proud of our Country!

Hello Friends! How strange is it that I paused with the title of this post, thinking it might be too political or controversial for this little card-making blog?!? Crazy times! But I did want to "stand out on a limb" and say how proud I am of these United States of America. There are certainly many things that need to be changed, always will be, but the fact that we can have healthy discussions openly and freely is something that I am especially grateful for. 

>>> Oh, how RARE & Beautiful you are <<<

Speaking of rare and beautiful, we're sharing more goodies from the new Pinkfresh Studio release today over on Instagram with a big hop and lots of prizes!


This shaker uses the new Essentials Shaker Stars and the older (from last month, hahaha) Rare and Beautiful set.


Check out the details on these dies!! LOVE! Did you notice that the star AND the star opening BOTH have the stitching around them? If you look closely you'll see I added the smaller star die to the background of the large blue shaker. Those details are just too good not to use!

Also, I'm happy with the triple gold embossing on the sentiment. For the thicker fonts, I love the look you get with multiple layers of embossing. You just have to touch it!


This is the first time I'm using the Crystals and am so impressed with how clear and sparkly they are. And the red is so deep and luxurious!


The overall design is inspired by the American flag, of course, with the stars on top and the stripes on bottom. Originally I just had the ink blending and it looked too plain. Once I added the stars and stripes it felt a lot better.
 
Thanks so much for stopping by today! Appreciate it!
-Kelly
 
Supplies used (affiliate links, thanks for your support!):


Winner! Winner!

Hello! Hello! First I must apologize for not posting this earlier, but I am happy to announce a winner for the Colorado Craft Company new Anita Jeram release!

I took a spin on the random number generator and got ...


 Comment #134, which is the lucky ...


Congrats Jen!!!

Jenski27, please send me an email at griglion@ameritech.net with the title "Colorado Craft Company WINNER!" and I'll get you hooked up with the $25 gift certificate!

Everyone else, hope you were able to pick up some goodies, and have been able to start working on your adorable projects already! If not, never too late to take another look at what's available from the new Anita Jeram release (wink, wink!)

Thanks for stopping by!  Always appreciate your delightful comments : )
-Kelly


Monday, May 24, 2021

Pinkfresh Studio May Essentials Release - New Card Size!! Mini Slimline!


Hi Friends! It's always fun to share new products with you, but today we get to share a new card format! The mini slimline!! I am madly in love! It's the cutest size, just like a little pamphlet, and the smaller size makes filling the space so much easier, yet there's still plenty of room to write your message inside. 

You may have arrived on the blog hop from Keia Shipp-Smith, but if not feel free to start with the Pinkfresh Studio Blog.


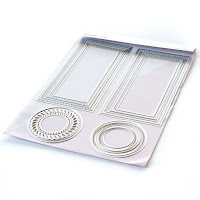
This mini slimline card is 3 1/4" x 6 1/4" and has a Mini Slimline Essentials Bundle Pack with everything you need, including two types of stitched mat sets! This card uses the horizontal stitching rectangle die, but there's also a diagonal stitched rectangle die, both in several different sizes.


There are two different Blanket Stitched Oval Dies and each one cuts an oval and an oval hole. I used the smaller oval hole here to have the Joyful Peony pop through, and the larger oval shape to outline it. LOVE all that texture around the oval!

I curved the sentiment to follow the shape of the oval and embossed it in gold.


The patterned paper on the front and inside the card is from the Happy Blooms 6x6 Paper Pad
 
TIP: Looking for an easy way to pick coordinating papers? Flip the paper over! The diamond patterned paper inside the card is actually the reverse side of the pink floral pattern on the front. Love this trick, as you're sure to get a well-matched patter without much thought or second guessing!


Did you notice the MATCHING ENVELOPE underneath the card?! So darn cute!! There's a Mini Slimline Envelope Die for this! The paper used for this envie, as well as the next two envies are from the Some Days 12x12 Paper Pack.


This card shows what both of the diagonal stitched mini slimline rectangles look like together on a card. Love the layers!

My new favorite edge is the Folk Edge Circle Die Set! What a great mix of stitching and tiny holes! I haven't seen anything like it on the market. I used one of the smaller circles in this set to cut a slit for me to stick the floral stems thru.


The flowers are leftovers from one set of the Be Strong Stamp/Die/Stencil set ... this is the third card I've made with the dies from this set, and I've still got one floral bunch left. Such a useful set, I've kept it out on my desk! Added epoxy dots for good measure.


I layered the main sentiment on top of the larger secondary sentiment to make it a little more interesting.


Finally, this card uses the Diagonal Stitched Rectangle die to cut the panel, with the Be Strong image stamped on the die cut. Once I adhered the bottom Butterfly to the panel I die cut the Diagonal Stitched Rectangle again to make it stay in the background.


The layered circle die cuts are also from the Mini Slimline Essentials Die Set. So many different combinations possible. I embossed one of the sentiments from the Butterflies set (which unfortunately is still out of stock, but will be restocked in early June, so keep checking back! Such a great set).


Just the body of the butterfly is glued down, so you can fold out his wing. More 12x12 double sided Some Days paper was used to make the cute ccoordinating envelope.

 GIVEAWAYS:

-We will be giving away the full release on the Pinkfresh blog & YouTube channel!

-We will also be giving away a total of TEN $25  gift cards along the hop!! Please comment 

on each post to be entered. Winners will be posted on May 31 , 2021 on our 

GIVEAWAY PAGE and must be claimed within 2 weeks.


SHOPPING PROMO:

We are offering free US shipping on all orders $50+ from May 24th to May 30th.
Please refer to the graphic above for the code that applies to you.


We also have a free die that will be automatically added to all orders over $35 -
no code needed!

Your next stop is the extremely talented Kelly Lunceford

Here's the entire blog hop list:

You are invited to the Inlinkz link party!

Click here to enter

Thanks so much for stopping by! If you liked my projects today I'd love to share more with you ... follow my blog and instagram to keep updated!

Blessings,
Kelly


 Supplies Used (affiliate links, thanks so much for your support!):

Essentials Mini Slimline Envelope Die Set


Mini Slimline Essentials Die Set


Essentials Folk Edge Circle Die Set

Essentials Blanket Stitched Oval Die Set


Jewels Lavender

Be Strong Stamp Set


Be Strong Layering Stencil Set

Be Strong Die Set


Joyful Peonies Cling Stamp

Joyful Peonies Die

Joyful Peonies Layering Stencil Set


Butterflies Stamp Set
Butterflies Stencil Set

Butterflies Die Set
Some Days 12x12 Paper Pack

Happy Blooms 6x6 Paper Pack