Wednesday, May 7, 2014

CFS In the Cards and Shuffle Fri-Dies


Hi folks! Here's a set that I absolutely had a blast with ... CAS-ual Friday Stamps' In the Cards and the corresponding die Shuffle. You can totally make your own set of cards! Seriously, so much fun. For this card I made a royal flush in clubs, and then stamped two different sizes of clubs on the background panel.


By using a brad to hold all the cards together, you can fold your hand, and refan your cards as you wish. Who doesn't like an interactive card.


I was really excited about the link between this card and the sentiment. By having one red heart inside the shaker, you would literally be "following your heart" as you shake the contents around. Yay! The pink camera paper is American Crafts Amy Tangerine Yes, Please.
  

 I never make shaker cards ... mostly because I dislike using foam tape. Well, the negative cut of the card die turns out to be perfect for making shaker cards! Instead of using foam tape, I cut two layers of chipboard and adhered them together to make the inside of the shaker. Then made the contents from the club/diamond/spade/heart dies.

One of my rules for buying dies is that it has to be something that I can't do on my own with scissors or a cutter. The rectangle card die at first glance seems to fit that category, because who can't trim a rectangle and then round the corners. However, when you use the die to cut the inside of something, that's something you can't do on your own, especially with the rounded inside corners.


Here's a sneak from a post tomorrow that also uses the card die and stamps (for my son's 10th birthday).

More inspiration waits for you with the rest of the fabulous CAS-ual Fridays Stamps Design Team:


Tomorrow we reveal the last stamp set before they are released on Friday. Thanks for looking!
-Kelly

Tuesday, May 6, 2014

CFS Heart Beats and Double Note Fri-Dies


 Hi folks! We've got more fun lined up with the second stamp AND die set to be released at CAS-ual Friday Stamps this week ... it's a double eighth note! Wait until you see all the sentiments that Michele thought of for this set ... totally a case of one being better than the next. I really like the idea that "two hearts" (yep, on the notes) "beat" (yep, a musical pun) "as one" (for an engagement ... perfect!!) There are so many sentiments to mix and match, that you can totally find the perfect one.

The eighth note on this card was stamped a few times for some energy. I piled on the gold with the garage sale doily (this is probably the 5th project I've gotten out of that one delicious doily), cousin Helen's gold thread from Greece, and some gold sequins. Patterned paper is Studio Calico Darling Dear.


So, remember the Heart Note from the last CASual Fridays release? Well now there's a Double Note, which is used on this card. Pretty awesome how you can now create your very own sheet music (with the treble clef, double note and single note dies!)

Here's the story on the three layers of note dies. Originally everything was die cut in aqua. Then I thought it didn't really support the sentiment too well because the actual treble clef wasn't emphasized. I changed the color of all the notes, but the new color of dark pink competed too much with the dark pink flowers in the patterned paper, making it too busy. So here comes the lighter pink third layer of notes. OK, way more information than you needed, I KNOW, on those notes, but that's the story : )

More inspiration waits for you with the rest of the fabulous CAS-ual Fridays Stamps Design Team:


Come on back, as we have two more days to debut even more stamps and dies! Thanks for looking!
-Kelly


Monday, May 5, 2014

CFS Big Treble and Treble Clef Fri-Die


Hi folks! Hooray for release week at CAS-ual Friday Stamps! There's a lot of good stuff to see today, and the rest of the week, as several new stamp and die sets are being revealed.
 

Today's feature is a stamp set and a die featuring a treble clef. Of course all the music lovers are jumping up and down, but it's also a good set for non-music themes.


Using just the treble clef stamp and rotating it in a circle, it ends up making a pretty neat design! I elected to just color in a portion of the treble clef. It was a pleasant surprise when the blue swirl design in the middle appeared. The exacto knife is used to cut an opening for the sentiment (from Casual Comfort) to slide behind.


The die is pretty fun with all the thin curves of the treble clef. Can you see how the die is used on this card? The straight part of the treble clef is cut off, leaving just the curvy part. After getting 8 curvy pieces on double sided paper, I arranged them on the 8.5" x 4" card front into a giant flourish.  So many different possibilities with these!

The two hearts are left over from the pieces cut off the treble clefs.

More inspiration waits for you with the rest of the CAS-ual Fridays Stamps Design Team:


Stick around over the next three days for more awesome new stamps and dies that you won't want to miss! Thanks for looking!
-Kelly

Thursday, May 1, 2014

Winnie & Walter Share the Love: Elle's Studio


Hi Folks! This week at winnie & walter we're sharing the love with Elle's Studio. We all received the same package of gorgeous product and were asked to have fun combining it with winnie & walter products. Fun, right?


As soon as I saw the bright, happy colors of the Everyday Moments line from Elle's Studio, I knew what had to be done.

No more procrastinating.

It was time to start my youngest son's Kindergarten album.

Yes, actually, I do realize that school will be ENDING in a few short weeks. It was my intention all year to get this going but it never really happened. The empty album lie open on my dining room table for months. It's been so long since I've scrapbooked that it was just hard to start it back up again. But I'm happy to report that I've made my start and actually completed a few pages. Yay me!!


The patterned papers on this layout, and the remaining layouts are from Elle's Studio Everyday Moments, so I'll mostly point out the w&w stamps. We've got the little captions stamped on the photos with Staz On ink from The Write Stuff: Leave it to Dad. The ticket (perfect for a fun fair layout!!) is from The Write Stuff: Love Story, and "friends" is from The Big, the Bold and the Happy. Actually, the stamp in the set is "friend" but I borrowed an "s" from the end of "father's" and stamped it right after the word. Oh, and the sequins! Those are a very thoughtful extra that came in my w&w package, so I'm counting those too. Yay for fun surprises!


 This Bingo Night layout has an arrow from The Write Stuff: Love Story stamped right on the photo, again with Staz On. I put it there because I felt the larger space of white on that photo drew your eye as the focal point, and I wanted your eye to start with the bingo photo instead. I'm sure there's a better way to change the focal point than a literal arrow, but as I said, I'm dipping my toes back into scrapbooking so please hang in there with me!

On the bottom left photo, I was happy with how well the balloon stamp from The Write Stuff: Leave it to Mom works in a scrapbooking context. I told the kids no fish were to come home with us (pet fish are among the prizes). Our last Bingo Night beta fish lasted 2 1/2 years, which is a much longer commitment than I'm looking for these days : )

OK, just two more layouts and then I have an actual card. Promise.


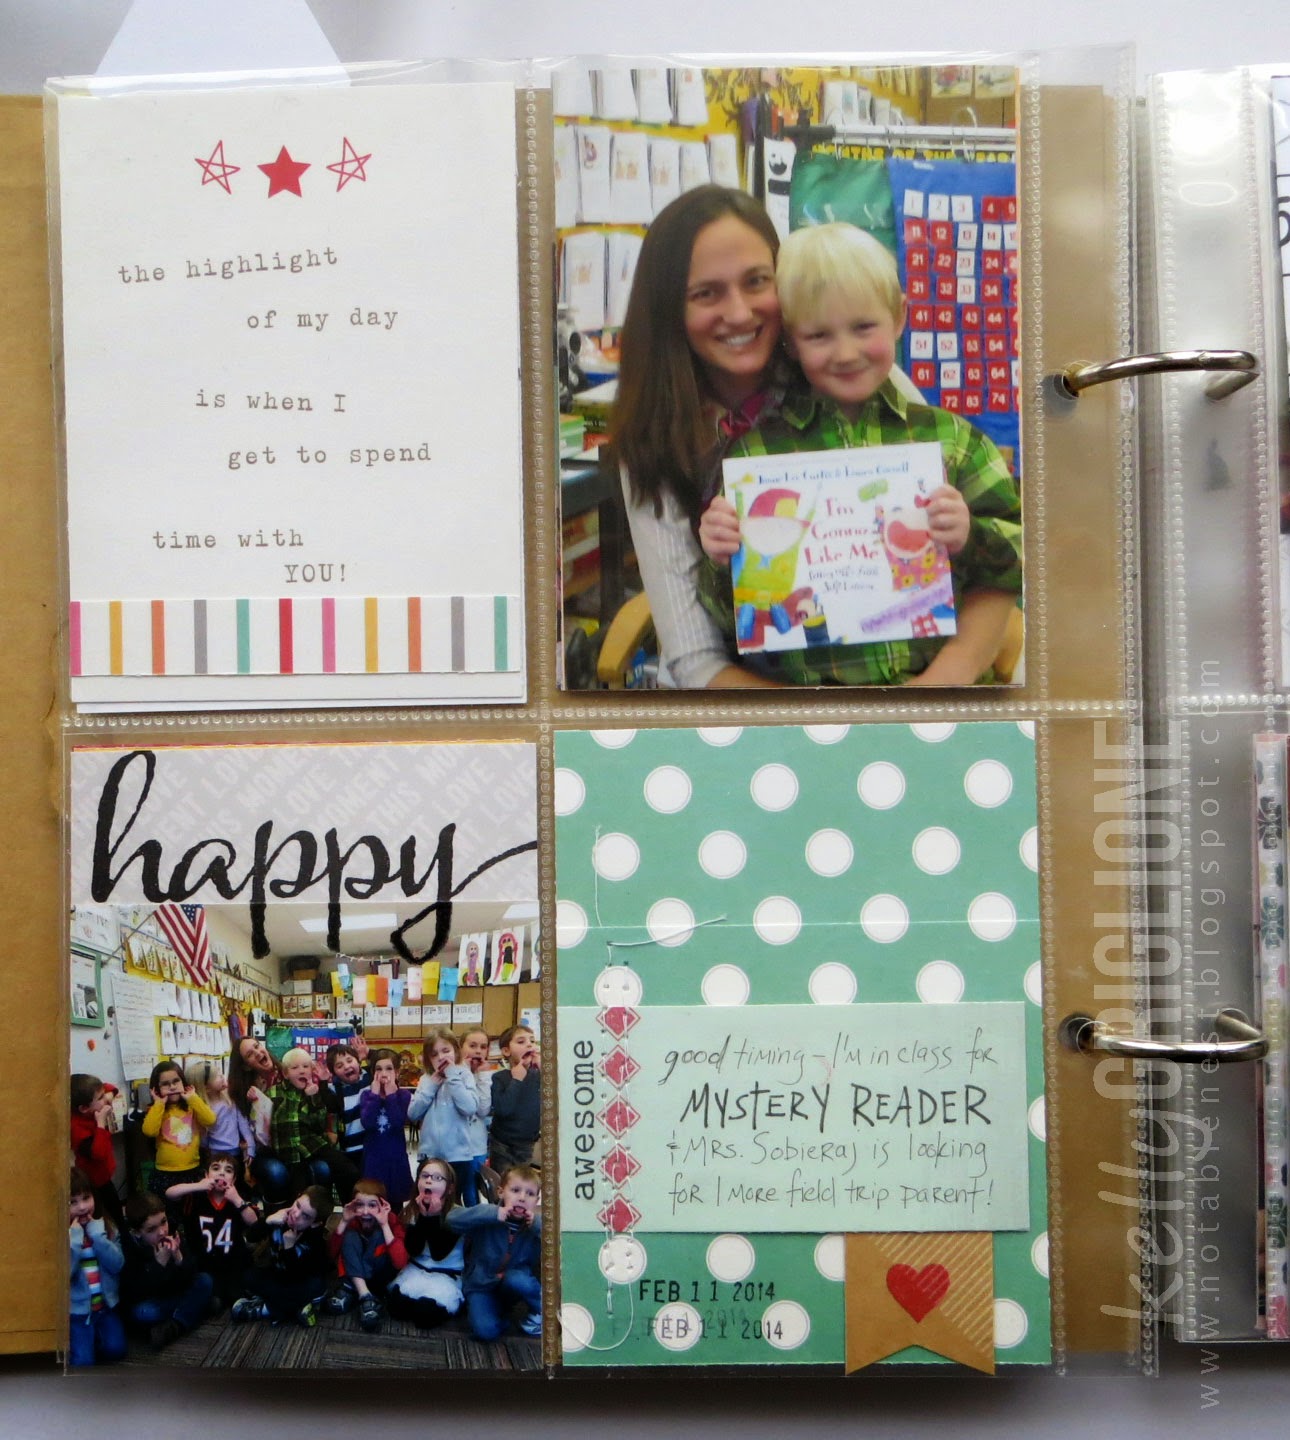
Here's "happy" stamped as a caption to the class photo (so funny when you tell Kindergarteners to make a funny face, they 100% of the time stick their fingers in their mouth ... ?) Then "awesome" from The Big, the Bold and You makes a nice journaling title, and the row of red diamonds from Parentville sets it off with a little sewing on top.


The cancellation and postage stamp from You've Got Love Mail are great for a page on the school valentines we made. On the bottom right the red tab that the arrows are pointing to invites you to pull out a journaling card (actually a left over valentine background). Below that we have another use of the word balloon from The Write Stuff: Leave it to Mom, and rows of hearts from You've Got Love Mail, which are perfect for filler background. The journaling strip was looking too bare after the journaling, so stamping a few rows of these hearts in different colors did the trick (and as a bonus fit in nicely with a page on making valentines!)

As mentioned, here's the card:


All embellishments are Elle's Studio, except the green airmail stamp, where the wood veneer star is strategically placed in the middle to cover up a "feb 14". The "you rock" is from The Big, The Bold and You. I like the casual feeling of the sentiment to match with the overall feel of the card. Especially because of the gray star background, I think this card could be for a teen boy or a teen girl.

Well thanks so much for sticking with my longer post! I sure hope you get a chance to check out winnie & walter to see more fun the team has had with the same products from Elle's Studio!

-Kelly


Friday, April 25, 2014

Papertrey April Blog Hop

April-Blog-Hop-Inspiration 
 I just couldn't help joining the Papertrey April Blog Hop, being so charmed by the simple red poppies with the black stitched centers. A lightening quick card for me, and a quick post. Sentiment is from Papertrey, as is the Irresistibly Ikat background in gray. Off to volunteer at Science Club, then to my son's first baseball game of the season. Good times!

Thanks so much for looking!
-Kelly

CFC #131 - Anyone Still Use a Cricut?!?


Hi folks! Here's a challenge that could lead to all sorts of different possibilities ... use three of something on just one third of your card front. Right?! Fun!

The winner of this challenge will get a fabulous prize from Loves Rubber Stamps and will also be featured in a post on CAS-ual Fridays Stamps. Runners up will receive a stamp or die set of their choice from CAS-ual Fridays Stamps!


As I was thinking about this challenge, I remembered a nice, graphic beach ball image on A Child's Year cartridge for the Cricut. I'm curious, who has used a Cricut in the last 6 months? Bobby, I think you have, anyone else? I have to admit, it was nice to open it up again and show it some love. Still works like a charm : )


My favorite, double-sided AC Lucky Charm paper make up the top two thirds of the ball. The bottom third is where I used my three items ... a sentiment (from Woot, Woot) stamped three times, and three letter dies for "one". The letters are extra thick because I had problems making up my mind. Originally, I had orange letters for a tone-on-tone look, but the ball looked a little top heavy. So I put the blue letters on top, and kinda liked how it was thicker and outlined a little.

The ball originally had four sections, but that wouldn't really do for a challenge using thirds.


So I had to cut the third and forth section and make them into one larger section. I have to say I like these colors together, but the ball in thirds is nice because it has room for a sentiment. I'll probably put some dymo label sentiments on this four-section-ball when it's time to be used.

You're not going to want to miss the inspiration that these talented ladies have waiting for you:


Can't wait to see your creations in the CAS-ual Fridays Challenge gallery!

Thanks so much for looking! 
-Kelly

Thursday, April 24, 2014

Fusion Challenge - Paper Straws


A third Fusion in a row for me! I immediately thought of my favorite paper straws when I saw the Fusion Challenge photo, but I only have the red and white stripe straws. In order to incorporate some of the other fun colors from the photo, I used crystal beads (which I never use on cards since they're bulky, but hey, I've already got the paper straws on there!) I only had clear crystal beads, so I used alcohol markers to change their colors.


Since the beads are just about as wide as the paper straws, they looked a little lost. I added the flowers on both sides of the bead. The rectangle that I cut from the middle of the card is framed with 1/8th" strips with mitered corners. Initially I used string to thread the straws and beads, but I found there was still a little give to the thread, and they sagged. Using wire helps combat this.

I was so happy with the straw/flower/bead combo, that I thought it needed to be used for something else.


It looked so festive, that a cupcake or cake topper came to mind. A number hanging from the middle is all you need to customize it for the birthday boy or girl's age. 


I think this would be great for celebrating on the actual birthday, when you're saving the big cake for the birthday party. Still fun and special!

Here are some fabulous cards by our design team!


WinnersWill be chosen by all of our teammates in two weeks. We each will choose one favorite. The winners will be announced at 4 am (PST) in two weeks!


Thanks for looking!
-Kelly