Wednesday, February 29, 2012

Retro Richard Scarry Card [CQC126, SRC #113]


This color challenge inspired my inner 70s child to make another card. How fun!


There's also a fun challenge at Stampin' Royalty to use only paper and ink, no embellishments. Yikes!

This time I targeted an old Richard Scarry book placed in the donation pile because my kids never really got into it (seriously, why not? it's classic!) After I thought about it, all I could see was 100 pages of great illustrations going out the door. So it stayed here. It was a little ... pun alert ... "scary" cutting the pages


but obviously I got over that and cut out a cute image of a crying pig from the "This Little Piggy Went To Market" nursery rhyme.


I thought the story line went along with an "I miss you" sentiment, so I put that under the pig illustration.


Brads for the "i" dots.

Thanks for looking!

Supplies used:
- PTI Block Letter Dies
- Dictionary Page
- Richard Scarry Book

Retro Boy's Car [CQC126]


Love the challenge at Colour Q - how retro! Totally takes me back to the 70s.


I'm excited to finally use some of my vintage ribbon that got rescued from the garbage. Mom was cleaning and luckily I saved a couple gems.


Can you get more 70s than these stripes?!? Used brads for the hubcaps, and left-over acetate from my Pop-up Flower card for the windshield. It's not a lot, but I like adding small details like that.


Thanks for looking!

Supplies:
Stampin' Up Wonderful Words Stamp
Martha Stewart Car Stamp
Color Box Tangerine Ink
Brads
Acetate
Mom's Vintage Ribbon

Liebster Blog Award


I have had such a fun time these last two months finally getting out there and participating in the blogging community. So many creative individuals, it's really overwhelming. Imagine my surprise when I received a Liebster Blog Award from three lovely ladies with incredible blogs:

Cyndie
who is not afraid to try new things or techniques to provide others with inspiration. You need to check out her flowers made of modeling film!

Suzanne whose blog is the first one I fell head over heals for. Each and every card is so well executed. It's always a treat to see her posts.

Nancy who is a crafting chameleon - making graphic clean and simple cards, then switching it up to do more vintage, layered cards.

Now for details on the award. 'Liebster' is German for 'dearest'. The award is a 'share-the-love' arrangement, given to inspirational bloggers with less than 200 followers. Here's the to-do list of any Liebster award recipient:

- Thank the giver and link back to the blogger who gave it to you;
- Reveal your five blogger picks and leave a comment on their blog to let them know;
- Copy and paste the award on your blog; and
- Hope that those you award forward it to their favorite bloggers.

Below are five favorite bloggers who have different styles but always inspire me with their work. This award is a great chance to officially thank them for sharing their passions with the rest of us.

Nicole at oncloud8 (fantastic photography and life experiences - spaghetti on a table)
Kirsti at Bondi Papercraft (perhaps my favorite card ever - a cassette tape with ribbon coming out that spells "I Love U")
Mindi at Niebuhrchicks (great project life pages and free printables - thanks!!)
Chris at Hutch Studio (inspirational 3D paper projects, like a paper house light fixture)
Marie at Stitch in Time (love her mixed media scrapbook pages and December Dailies)

Thanks so much for all the inspiration you've given me! Please share the love and visit these talented individuals.

Monday, February 27, 2012

Multi Challenge Card [MIM #55, CFC41, PDCC 120]


A triple card challenge today:
1) Papertrey Ink's MIM #55 - make a large frame using a smaller frame stamp
2) CAS-ual Friday's CFC41 - use a pun on your Clean and Simple card
3) The Play Date Cafe's PDCC 120 - use only baby blue, orangesicle, and basil colors

So being the queen of efficiency (laziness?!?) I thought why not combine all three challenges. And so I did. Whew.


This is the color scheme inspiration.


And here is the card. I LOVE (and have) mercury glass lamps so that's what I wanted the lamp base to look like. American Crafts silver foil paper is the closest I could get, and I'm pleased with how it gives a nice shine, similar to a real lamp.


I thought it would be fun to add a pull chain for the switch, so I suspended a pearl from a blue (remember the color challenge!) metallic thread. You can see the reflection of the pull chain in the base. The pull chain is on one layer of mounting tape, while the lamp shade is on two layers to give it depth.


The larger black frame is used by stamping half of Papertrey's Fillable Frames #4 four times, lining up each end. I used a straight piece of paper to make sure only the ink from the top half would stamp. So glad this technique was spotlighted, would have never thought of it on my own.

And of course the pun is you "light up" my life. Could be used for birthday, thank you, thinking of you, congrats, whatever. Lots of flexibility with this one!


So in between dropping my son off at religious ed and going to Aldi's, I thought maybe it would look neat to rub a white ink pad over the textured background so it wasn't so blue. Does anyone else think about crafty things at odd times?!? So before putting the groceries away when I got home, I came up to my craft room and tried it out. I'm thinking I should have focused more on remembering the chili powder than messing with the card. I prefer the solid blue background instead. Oh well, win some, lose some.

Thanks so much for looking!

Supplies:
PTI Lighten Up Stamp and Die
PTI Mat Stack 4 Stamp and Die
PTI Fillable Frames 4 Stamp
PTI Damask Impression Plate
PTI Aqua Mist and Black Ink
American Craft Silver Foil Paper
Metallic Thread
Pearl Bead

Saturday, February 25, 2012

Sliding 9th Birthday Card [PTI Blog Hop]


I so LOVE getting things done ahead of time, mostly because it never happens so when it does I really feel good! Papertrey's February blog hop challenge is to make an interactive card. Great timing. I read the blog post, and an hour later my doorbell rang with the latest shipment from Papertrey! Interactive cards are perfect for grabbing the attention of kids. So I decided to make an interactive card for a birthday that's 2 weeks away (in my world, this is ridiculously early!)


The card lies flat, then when you "pull here" it pops up the main design.


You do need to do a little pre-planning when using the Movers and Shakers: Sliders die. I'd suggest assembling the slider, then marking with a pencil how far it pulls out so that your sentiment is completely visible. I cut it a little too close.

There's a YouTube tutorial that Papertrey did on how to use the dies. 


Of course, can't forget about the inside.


This was a fun card to make. Hope darling Tessa likes it! Thanks for looking.


Supplies:
PTI Movers and Shakers Sentiments
PTI Movers and Shakers: Sliders Die
PTI By the Numbers Die
PTI Raspberry Fizz, Hibiscus Biscuit, Mellon Berry, Ripe Avocado, Lemon Tart Cardstock
PTI Mendhi Medallion Impression Plate
American Crafts Textures Stamp
Sizzix Die
Martha Stewart Snowflake Punch
PSX Pixie Alphabet Stamps

Friday, February 24, 2012

Snowflake Hello Card [MIM #54]


So inspired by the huge, chunky snowflakes coming down all day yesterday. They were about as big as the snowflake on this card! Crazy.


Supplies:
PTI Damask Snowflake Die
PTI Double Ended Banner Die
PTI Just The Ticket Sentiment Stamp
Martha Stewart Starburst Punch
Swiss Dots Embossing Template
Corner Rounder Punch
Grosgrain Ribbon
Wire

Wednesday, February 15, 2012

Scrapbook Page - 223rd Week of Being Brothers

As Cathy Zielski's Ten Tips for Better Type class at Big Picture Classes is winding up, she is encouraging us to make an original layout using what we've learned. In the spirit of Project Life and scrapbooking the "now", I decide to capture the relationship between my sons in this, their 223rd week of being brothers. I was VERY tempted to fudge a week and call it their 222nd week - how neat and purposeful of a title would that be?


Having the sewn grid helps me keep the clean and simple style. Each section has a snippet of the week - either in text or photo form.


To keep the layout manageable I hide several of the stories and photos under flaps. The flaps are hinged with a section of the Spyder plastic bag that was left on my desk from the Project Life layouts. Convenient, and it works really well!! The flap lays flat, unlike when I used a paper hinge and the flap kept popping up. You can see a glare on the fancy "bag hinge" in the top flap below.


Not only am I able to squeeze in more content, but I think the boys will have fun interacting with the page. Different hearts are stamped on the inside of the flaps to support the theme of brotherly love.


None of the stories are monumental occasions. They are ordinary life. Moments that would otherwise easily be forgotten. I do have a sort of peace knowing that these particular stories will be remembered.


If you're interested, here is the text from each journaling block (otherwise, that's it, thanks for looking!):

Jackson hits Dayyan. Later we find out it’s because “he was hitting my brother.” Hahaha, “No, Jackson,” we explain, “they are just playing basketball. Dayyan is trying to slap the ball out of Logan’s hands. That’s how you play the game. It’s OK.”

Logan (in a sweet, I’m-your-concerned-big-brother voice) comforts Jackson by saying that he probably would have won the Lego Star Wars video game if they didn’t have to turn it off right then. What a nice change from arguing about who is winning.

Jackson has 5 minutes to change into pjs, or he goes to bed as-is. Tonight he’s sent to bed without his shirt on. Logan jumps off his bunk bed ladder and tears through the clothes on our closet floor to find a top for him. And he finds one! “Otherwise he’d be too cold,” he explains.

Quite often we’ll wake up with one or more of the brothers in our bed. I wake up to Logan telling us, “Mom, Jackie is hugging me!” How sweet. Then you hop out of bed to play downstairs and Jackson is just as quick to follow you.

AND TO KEEP IT REAL, Jackson comes running into my arms in a crying mess 5 or 6 times today. Logan’s killing my troopers, Logan’s killing my Lego guy, Logan won’t let me win, Logan won’t play with me, Logan’s bombs are getting through my shield. Good grief!


Supplies:
Bazzill Cardstock
PTI Block Letters
PTI Doily Details Die
PTI Block Alphabet Die
PTI Outlines Alphabet Stamps
American Crafts Junior Patterned Paper
Sewing

Monday, February 13, 2012

Scrapbook Page - Cathy Zielski Template

I've always loved the clean, graphic style of graphic designer Cathy Zielski, so when she was offering a class at big picture classes I immediately signed up.

Big Picture Classes

Our homework is to create a page using her digital layout.


I added some Hippie Chick paper to go along with the spirit of communing with nature (well, and I loved the design!)


It was a fun class!

Saturday, February 11, 2012

Falling in Love Card [PTI Challenge #7]

The final Anniversary Challenge from Papertrey Ink is to create a card that has a heart in it. So while I was sitting in the theater with the family waiting for Star Wars I 3D to start, I decided I wanted to try a stair step card.


The "falling in love" sentiment ties in with the hearts falling from the tree. "Falling for you" is another option. You may recognize the cardstock from my pop-up card a couple weeks ago. I considered using something else, but I really like the graphic nature of this paper, and that it's green for the grass.


The tree is cut from a thicker cardstock - my husband's comic backing boards. You could also use chipboard, mat board, or probably just layer a couple pieces of cardstock together. I took the photo above to show how the bottom of the tree is narrower than the trunk, so it won't fall through the slit in the base.


Score your 8.5" x 5.5" base at the following increments along the 8.5" side: 2 1/8", 4 1/4", 5 3/8", 6 1/2", 7 1/2". Accordion fold. At the top of the middle mountain fold make a slit as wide as the narrow bottom of your tree.


Slide the tree through the slit. Underneath the base, adhere a dime to each side of the tree. This will help weigh it down and keep it standing straight up.


Punch a bunch of hearts. Punch a small hole in half of them and thread silver wire through to make the hanger. I tried silver thread at first but it was annoying trying to tie the knots on such a small sized project. I think the wire makes it look more contemporary, and different, anyway. Happy accident.


Adhere the other half of the hearts randomly on each level like they have just fallen off the tree. Also you can put a sentiment on the large fold in back.


I think I may keep this one and put it out for Valentine's next year. Or I could give it to my husband, and then keep it to put out for Valentine's next year!


Thanks for looking!

Supply List:
American Crafts Amplified cardstock
PTI Pure Poppy cardstock
PTI Double Ended Banner Die
Old heart punch

Linking to:
UndertheTableandDreaming

Elephant Birthday Card [PTI Sketch Challenge]


Here's one last card as Papertrey wraps up its fun and inspiring 5th anniversary set of challenges. Today's challenge is to use one of their free sketches as inspiration. Our niece is turning has already turned two, and we need to send a card!


To give dimension to the elephant I cut along the outline of the ear and then bent it forward. That left an empty space behind the ear, so I colored another piece of paper and adhered it behind the ear.


I'm getting better about sticking in there and spending a little time on the inside of the card!


Thanks for looking!

Supply List:
PTI Think Big Favorites #1
PTI Banner Builder Stamp and Die
PTI By the Numbers Die
PTI Limitless Layers Die
PTI Sunshine Impression Plate
PTI Cardstock
American Crafts Textures Stamp

Thursday, February 9, 2012

Project Life [weeks 1-4]

I can't say enough good things about Becky Higgins' Project Life. The system of creating weekly scrapbook pages has so many benefits, including:

- keeping me on schedule (HUGE for me, I need deadlines or it doesn't get done);
- letting me be as creative as I have time for;
- regularly showing something CURRENT to the kids and seeing them get excited;
- providing a place to keep "randoms" (clothing tags, art, tickets, mail, whatever);
- documenting the everyday stories (ones that would otherwise be lost forever);
- using my supplies (how many new products have gotten use, finally);
- printing photos out (last year I took thousands, printed only a dozen); and
- staying close to one of my most important goals as a mother - memory keeping.

Thank you Becky Higgins. Without being too dramatic, I consider this a life-changer project. The only thing I don't love? The page protectors have been out of stock on Amazon! I didn't decide to jump on the [huge] bandwagon until New Year's Eve and they were already sold out by then. But I'm not letting that stop me, and have taken photos of the "pages" anyway.

So, photos shall we?
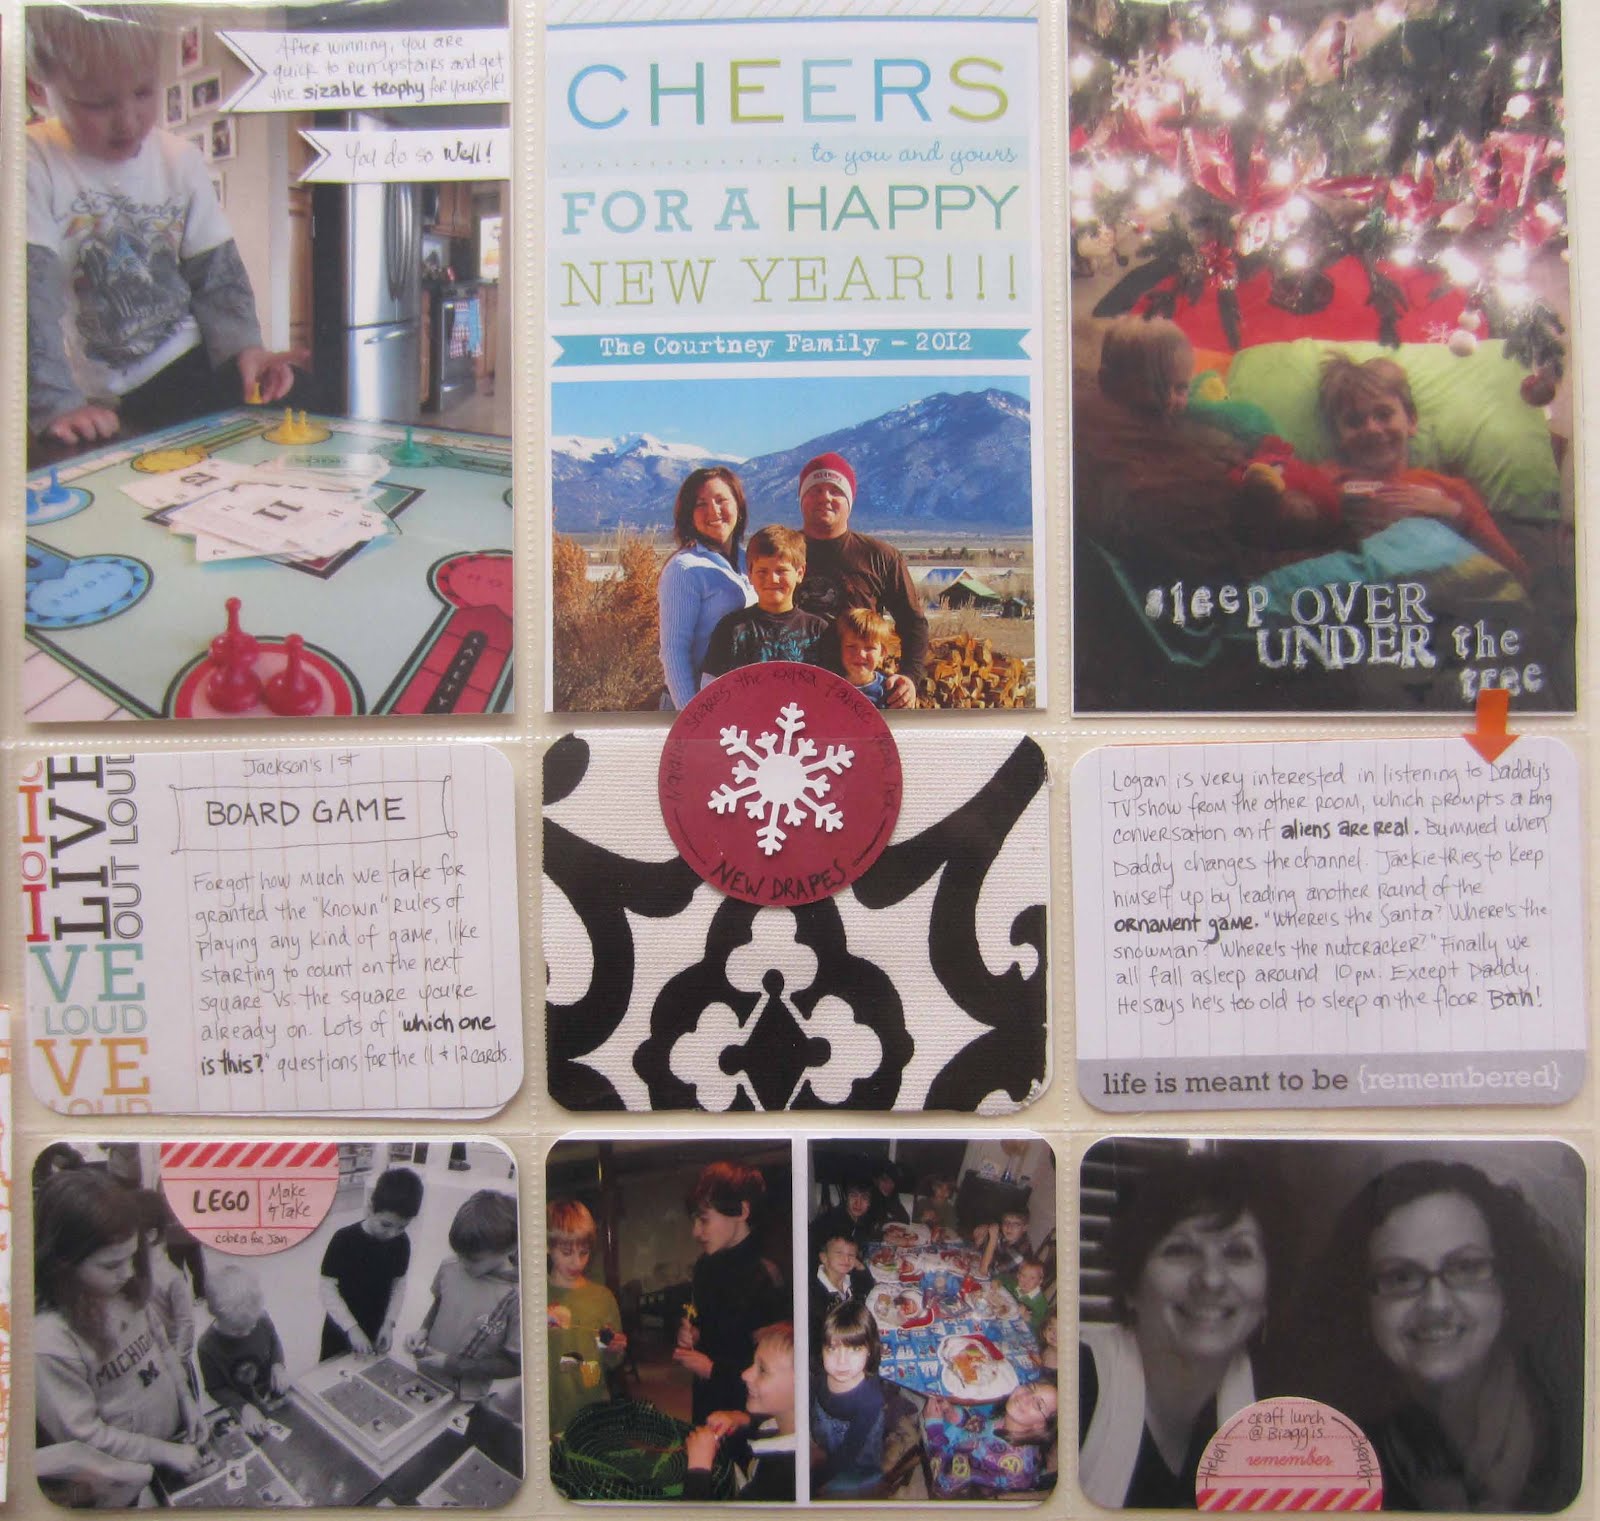
Week #1


A snippet of an email sharing a great word for this project.


I used a page protector D (instead of the usual A style) for the right hand side. Going forward, I think I will be consistent and use all style A layouts.


I was excited to stamp right on the photo (although I felt a little naughty doing it, must get over this!) I had to use the embossing gun to set it so the ink doesn't smear. As you can see, I didn't do a great job. But that's the beauty of this project. It's real life, smudges and all. The photo actually buckled a little too when I had the gun on a spot for too long. Next time I'll know.


Week #2


Why not record some dreams from the week?


This week I included an insert about how thankful I was to spend the afternoon downtown since the next day it was cold and snowy. The insert is in a regular 8.5 x 11 page protector that's trimmed down and secured by sewing on washi tape at the edge.
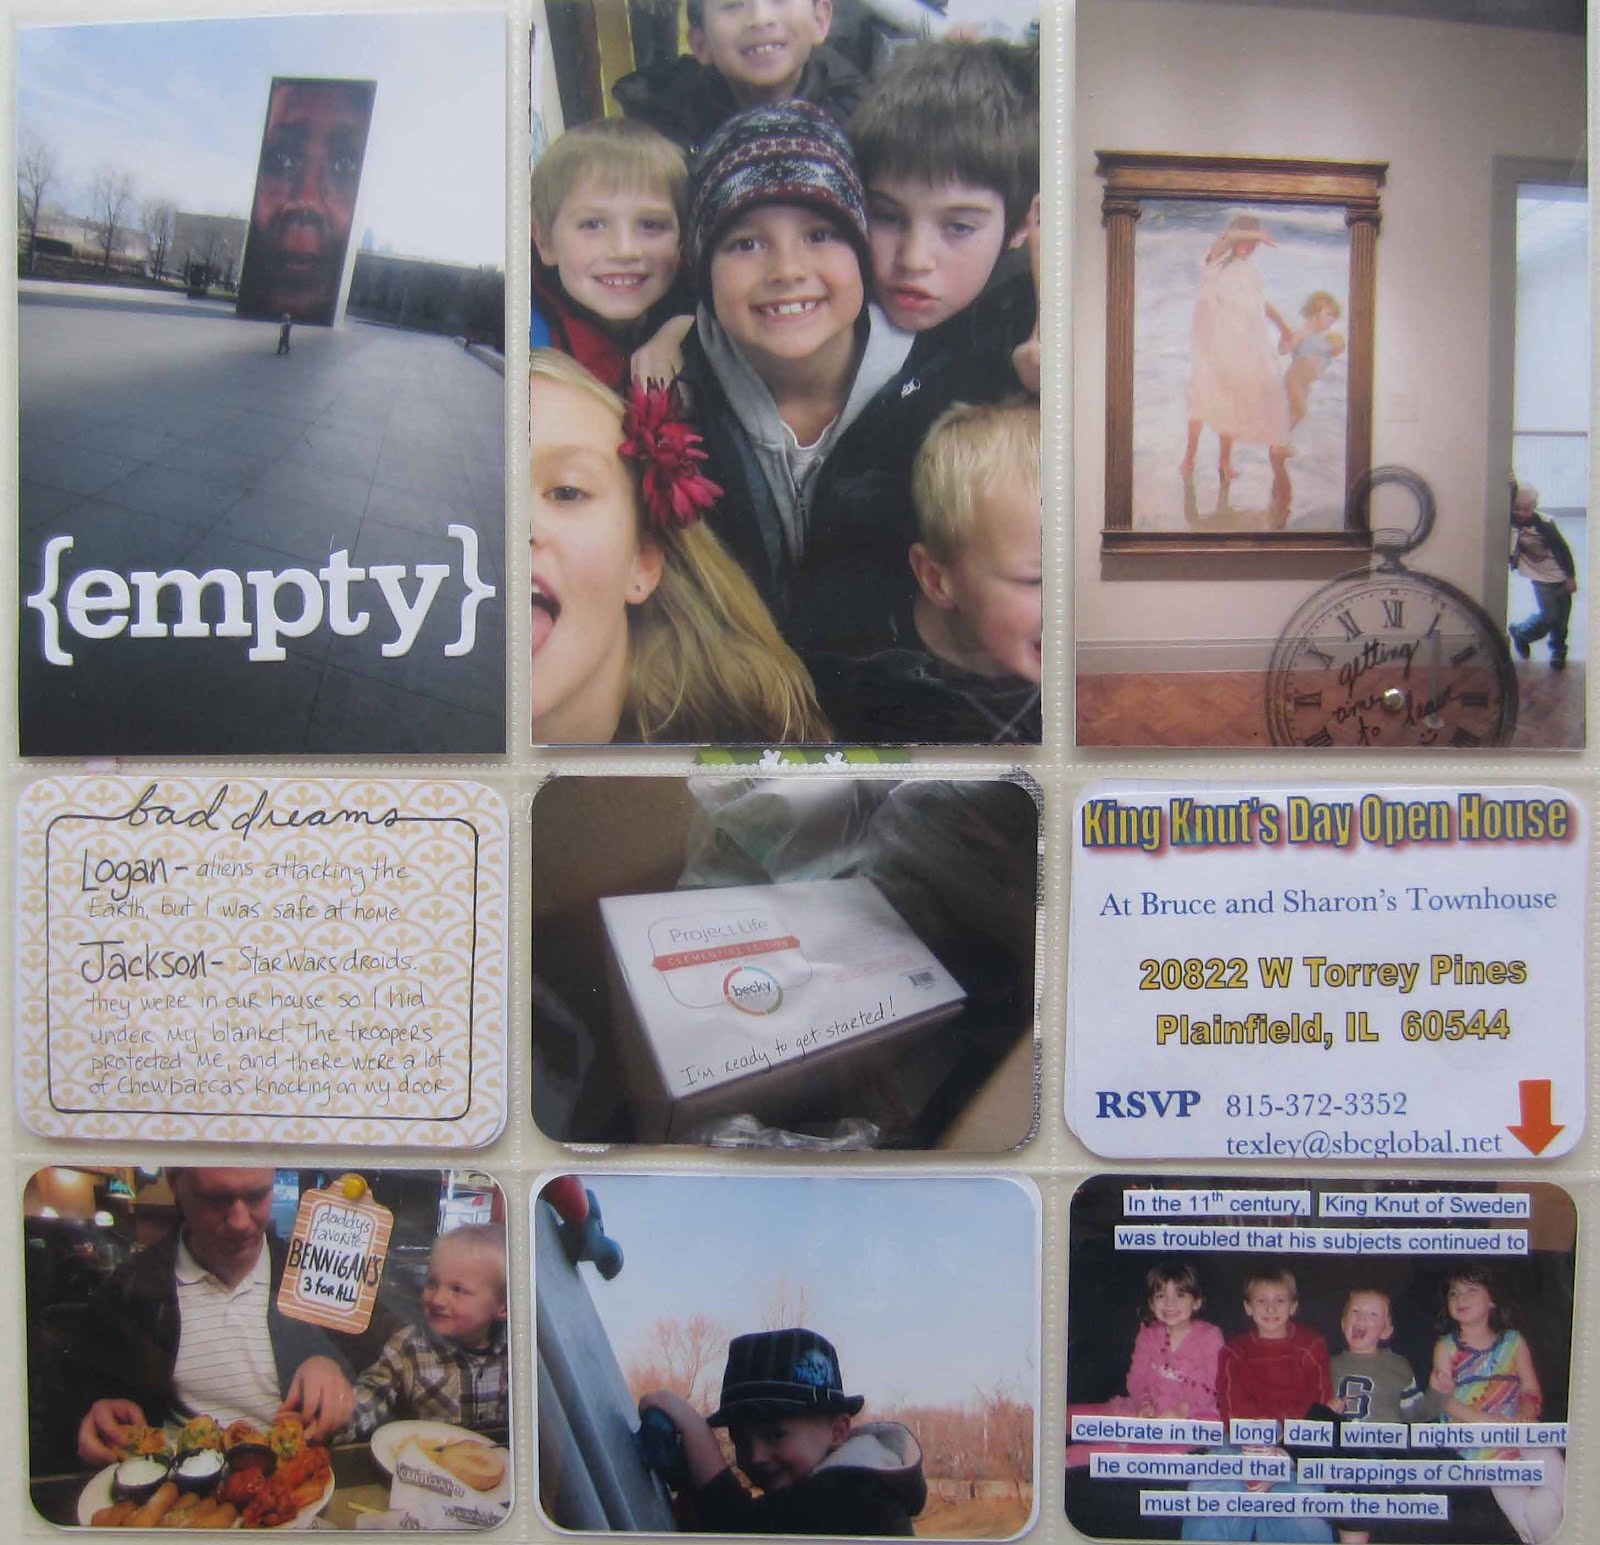


Week #3


The clear bag with a large, graphic Spyder from a purchase this week is perfect for Project Life. Just punch two holes so it will fit in the album, reinforce, and you have a peek-a-boo divider between the pages.


Can I tell you how hard it is to keep little rectangles lined up on a mat board to take photos when it's been turned into a train track?


Oh my, the butter incident from Jackson's first attempt at making toast. So glad I captured this memory! Love writing on photos with permanent marker.


Week #4


Inspired by one of Ali Edward's posts on looking at a photo and coming up with a variety of different stories to tell. Love that idea. So I brainstormed 4 different stories to go with the egg photo.


Seriously, before this project I had no idea there were so many different kinds of security envelop liners. Never even looked twice at them. How cool that this represents the variety we received in the mail this week!


Thanks for sticking with my longest post ever. I'm surprised and delighted that I'm not behind on this project yet!