
I've got a really fun 3D Christmas ornament to show you! It's very inexpensive to make (paper, ribbon and a bead) and is so interactive for the recipient. Plus it stores easily since it folds up, so you can use it for years and years!
It starts off as a tag for a present ...
It starts off as a tag for a present ...

and when you slide the bead back, it explodes into a 3D paper snowflake ornament ...

It's based on a folding technique that my friends Helen and Rene used at an ornament exchange last month. Basically, take 5 snowflake dies, fold them each 3 times, glue 'em all together, add a ribbon and bead, and you're done. If you'd like to try this, keep reading for step-by-step instructions:
1. Cut 5 snowflakes (or circles, or squares, whatever you want).

2. Score die cut in half, turn 90 degrees and score again. Make a third score in between the first two. (NOTE: it's easy to find the middle on this snowflake shape, but if you are using a shape that does not have a clear middle, like a circle, it's best to skip the scoring board. Do the following instead: 1) fold the circle in half with your hands, 2) rotate 90 degrees, match the two fold lines and fold in half again, 3) flip the circle over, rotate back 45 degrees, match the opposite fold lines and fold. You won't be able to tell the folds aren't crisp. You can now skip the next step and go to #4.)

3. Fold along first two score lines (the ones at 90 degrees). Turn the die over and fold in the opposite direction along the score in between the first two lines.

4. Push the last fold towards the middle,

and push down so you have a 1/4 section of the snowflake. Repeat for the remaining 4 die cuts.

5. Glue each folded die cut on top of each other. You should have a stack of 5 folded die cuts.

6. Glue a ribbon on the top of the stack of folded die cuts, with the long end going away from the pointy center. Glue another ribbon on the bottom of the stack of die cuts. Cut (2) 1/4 sections from a new die cut.
Tips on the ribbon: The ribbon should be pretty long so you can tie the ends in a loop later, and allow the ornament to open up (about 6"). The ribbon should also be proportional to the size opening of the bead you will use. If the ribbon is too thin, your bead will flop around and won't be able to hold the ornament closed. Obviously, if the ribbon is too thick it won't fit through the bead. You can play around to make it work. For example, I wanted to use baker's twine for the circle ornaments I made for our Christmas party, but it was too thin. So I simply used two layers of baker's twine and that did the trick. It also looked a little more interesting and substantial.
Tips on the ribbon: The ribbon should be pretty long so you can tie the ends in a loop later, and allow the ornament to open up (about 6"). The ribbon should also be proportional to the size opening of the bead you will use. If the ribbon is too thin, your bead will flop around and won't be able to hold the ornament closed. Obviously, if the ribbon is too thick it won't fit through the bead. You can play around to make it work. For example, I wanted to use baker's twine for the circle ornaments I made for our Christmas party, but it was too thin. So I simply used two layers of baker's twine and that did the trick. It also looked a little more interesting and substantial.

7. Glue the 1/4 section on top of each ribbon so the ends are hidden.

8. Thread the ribbon through a bead. Repeat for the second ribbon.

9. Tie a knot at the end of the ribbon. Slide the bead down to keep the folded die cuts held together. This is also how you'd store the ornament, so no worries about the tips getting bent in the ornament box. This is also how you can present the ornament, making the recipient guess how to open it.

10. Have the recipient slide the bead up the thread and give the ornament a little flip to see it explode out into the 3D snowflake shape. Fold the dies up and slide the bead down to "lock" the ornament back into place.


Here's a straight-on view.

Here's a side view. It's a little tricky to describe and photograph, but it's oh so fun to do!

If you liked this project, check out a similar one using circles instead of snowflakes.
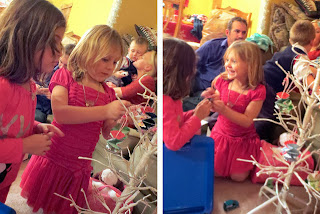
I made these as ornament gifts for all of our young cousins. They loved them!
If you liked this project, check out a similar one using circles instead of snowflakes.
I made these as ornament gifts for all of our young cousins. They loved them!
Thanks for looking!
-Kelly
This is awesome Kelly and the little bead is perfect for this!
ReplyDeleteCould you tell me, what did Kelly use to make the Snowflate? Thank You for your time
DeleteKelly this is so COOL!!! You are the queen of cool snowflake techniques my dear!!!
ReplyDeleteLove it!!!
Hi Kelly, I know we've visited before, but I came over from Darnell's blog anyway to say hi ... and I'm so glad I did because I found this ... WOW! This is truly truly amazing ... I love it! Thanks so much for sharing ... I MUST set aside some time to play! Anita :)
ReplyDeleteso cute!
ReplyDeleteHey Kelly! Thank you so much for taking the time to prepare this picture tutorial and sharing it with us! Your time is truly appreciated...especially at this busy time of year.
ReplyDeleteGoing to give this a try this evening...if I have time :)
Oh Kelly that makes you officially the Queen of 3D for me!! Love the snowflake and thanks so much for the tutorial
ReplyDeleteHave a wonderful weekend
Tascha
Terrific tutorial Kelly - I decided since I'm over here all the time checking out your fabulous creations that I just have to officially "follow" you LOL
ReplyDeleteThat is super cool. I would love to give it a try!
ReplyDeleteGorgeous!
ReplyDeleteThanks so much for the beatiful pictures and great tut'
Have a lovely week-end~
Love this ornament! Thanks for the tutorial!
ReplyDeleteHoly smokes that's awesome!
ReplyDeleteGorgeous ornament kelly.
ReplyDeleteHow cool is this? Thanks for a great tutorial, too!
ReplyDeleteThis is pretty darn cool! I am pinning it....hoping to find some time to try it!
ReplyDeleteThis is a terrific project Kelly~I love this! I'll have to pass this tutorial on to my crafty friends.
ReplyDeleteHey Kelly! Thanks again for linking up to this week's Tuesday Trigger in the Moxie Fab World! :)
ReplyDeleteWhat a gorgeous ornament. And how fun that you can fold it up!!
ReplyDeleteHugs and smiles
Ok now I am going to try this. Like I said before you are amazing! Thanks for taking the time to show us the steps … I hate doing that.
ReplyDeleteNo way!!! That is the coolest thing ever! Wonder if I'm smart enough to follow directions?! :)
ReplyDeleteI love it Kelly. What did you use to make your Snowflake?
ReplyDeleteHi Terry! Wasn't sure how to contact you, so I'll just reply here and hope you see it. This is the Damask Snowflake die from Papertrey ink: https://www.papertreyink.com/pti-dies/papertrey-ink-damask-snowflakes-die-collection-set-of-2/ It's quite pricey at $23, but I have gotten many uses out of it so far. Thanks for your comment : )
DeleteHi there! Are there instructions for making the round paper ornaments (or a video). Thanks!
ReplyDeleteHi Cheri! I don't have separate instructions for the circles, only because they are made exactly the same way as the snowflakes. You can just score/fold your circle in half, turn 90 degrees to fold again, and then fold in between those two folds (at 45 degrees). Exactly the same way. Good luck!
DeleteWhat a gorgeous ornament. I love to read all And how fun that you can fold it up!!
ReplyDeleteHugs and smiles.. N95 Mask exporter rock on carry on dear And N95 Mask exporter
Designed for people who work in a hospital, the N95 Protective Mask offers quality protection from dust particles and other airborne and liquid-borne pathogens. The facepiece can be adjusted to fit virtually every face size. It is also non-medical and is non-medical. The basic information needed for purchasing the N95 Protective Mask is its marketing authorization and manufacturer's name. It should be noted that it is available in many countries.
ReplyDeleteN95 Protective Mask exporter
They will not absorb moisture and therefore not cause the wearer to sweat. Unlike the cloth masks, the non-woven fabric will not absorb any of these chemicals
ReplyDelete. They will not absorb moisture and therefore not cause the wearer to sweat. Unlike the cloth masks, the non-woven fabric will not absorb any of these chemicals
There are various types of carbon 4 ply masks in the market. These are made using Activated Carbon Filter Fabric
ReplyDeleten95 mask