Hi folks! I'm so excited to show you four different things you can do with the new
Hands die at Ellen Hutson!!
This set comes with a pair of hands in a small and large size. Aside from giving you more options with your design, the two different sizes also makes it a lot easier to create multiples when you can run them both through at the same time. This comes in handy for cards like this first one where you want a lot of hands to make a crowd ...
1. Make a cheering crowd. Some of you may have seen my post on Instagram where I shared my inspiration for this card.
Now that the boys are old enough to be left at home for an evening we've been attending a lot of concerts. To me, there's nothing like the feeling of one of your favorite performers coming on stage for the first time, and the crowd going wild.
This translates perfectly to this card, where you just see the shadows of all the hands raised up in celebration. And how easy is this card to make ... just die cut a bunch of hands, stick them on a card base that's been blended with white ink in the middle, and heat emboss the sentiment. It's a perfect congrats card for those hard-to-impress teen boys.
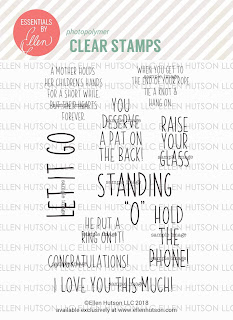
2. Use them to enhance your sentiment. You may have several sentiments already that would work with hands, holding, gestures (like waving "hi"), etc. but if not, there's a coordinating stamp set called
Hang On with several compatible phrases.
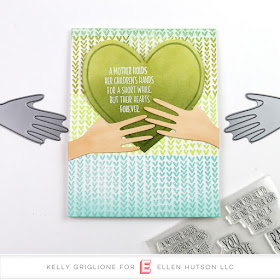
This card uses one of those phrases, embossed onto a heart I cut out, and held by a mom wearing a sweater. I really love the visuals of this card echoing its sentiment to send a strong message.
3. Use them to hold your gift inside the card. I am SO EXCITED about this one, and this reason alone would make me want these hands! How many times to you go to put a gift card or money inside a card and HAVE NO IDEA what to do with it so you just put it loosely inside the card? Then maybe it falls once the recipient opens it, maybe not, you have no idea.
If you adhere the base of a hand under a strip on the bottom of your card, just fold up your money and slip it in between the fingers. No need to adhere it ... it's light enough and small enough to stay put through normal use of the card. If you have a gift card, you might want to put light adhesive under the gift card, but it would still have a purpose for being on the card (because someone is giving it to you).
I love that it literally looks like you're being given money by someone (you)!
4. Depict Sign Language. I can't decide if idea #3 or #4 is my favorite ... being able to actually show a specific sign language word/phrase/letter opens up a whole new door of communication with these dies!

This one here is the sign for I Love You, where the letters I, L and Y are all combined.
I kept everything white, except for the red sentiment, and the subtle background with a stamp from
Snow Days. Conveniently, the "I Love You" phrase is also part of one of the sentiments in the
Hang On set. Just think of the possibilities here! You could bend the fingers to make so many different things ... Hang Ten, have it point to something important, make an initial in sign language, actually spell out someone's name in sign language, OK, call me, etc. It would be really fun to make a series of these cards too. Or a set to give someone.
Sure hope you came away with some good ideas for this set of dies and/or the coordinating stamp set! It's available starting TODAY in the
Ellen Hutson shop!
Thanks for looking!
Kelly
Affiliate Links (which simply means if you purchase something using these links I get a small portion of the sale, at no additional cost to you. So appreciate your support!)


