Tuesday, November 22, 2016

A ROUND of Applause

      
Hi folks! This card is over at the CAS-ual Fridays Stamps blog today, where I did a quick tutorial on how to get a straight sentiment to curve around a circle using the MISTI.
 
  
Feel free to use my code "KELLY2016" which will save you 15% off any purchases at CAS-ual Fridays Stamps. This is even more awesome because a lot of the stamps are ALREADY on sale so you get an additional 15% off the sale price.

Thanks for looking!
-Kelly

Saturday, November 19, 2016

Winnie & Walter Tour of the Stars Blog Hop

 
Hi Folks! We're celebrating the end of the Winnie & Walter winter release reveal with a Blog Hop showcasing all the fabulous new products that are already available to purchase! You may have come from the fabulous Kate Capper, but if not, you're more than welcome to start at the beginning with Winne & Walter.
  
   
My two cards use the adorable snow scenes from Season's Tweetings with Evelin T Designs. This card is super simple, even for coloring the snowman. I mean, c'mon, he's WHITE! 90% of the work is already done before you've uncapped your markers.
  
    
Seriously, how adorable is he? I cut a few layers of my husband's comic book backing boards for extra dimension (these are perfect for this purpose, about twice as thick as the 110 lb paper, but not too thick that you can't cut through it easily, like chipboard sometimes). 
 
 
This set also comes with an igloo (hello, also white!) and several more adorable winter characters. I like these images for a birthday card because it reflects the season, with the colored lights on the igloo, but there is no Santa, reindeer, Christmas tree, or anything else that screams "Christmas" instead of "birthday". I don't have a December birthday, but one of my best friends from childhood had a birthday on Dec. 28th and she never loved getting Christmas items for her birthday.

I love using and mixing ALL the sentiments from Winnie & Walter, and really think that makes for a well put-together card. A few different fonts that go together are all you need. I liked this combination of sentiments so much that both cards use the same wording. For these cards I've used the new The Big, The Bold, and Greetings, Sentimental: Winter, and two of the older The Big, The Bold sets (Merry and Party).

Good news on prizes, five randomly chosen commenters will receive $30.00 credit to shop at Winnie & Walter! All you need to do is leave a comment by Monday, November 21, 2016 at noon CST.

Your next stop is the amazingly innovative Keren Baker (love what she comes up with!)

Thanks so much for looking!
-Kelly

PS. In case you missed them, here are my other cards from this release:


Friday, November 18, 2016

Winnie & Walter Release Day 4

 
Hi Folks! For the last day of the Winnie & Walter release I'd like to share a card that is very outside my comfort zone. For those who've followed me for awhile, does it look odd being on my blog?! I am not a color-er. What can I say, the new Winnie & Walter stamps inspired me to try something I'm not very good at, and I think that's quite a testament to the stamps!

Aside from the owls, the sentiment is pieced together from two different sets, and the string of lights is from another set entirely. You would never know four different sets of stamps are used on this one card. They just all coordinate so well together! Originally I was going to blend some ink to fill the space under the branch, but instead I decided to do some loose cross hatching with a felt pen. I wanted the owls to stand out more after all the hard coloring work, gosh darn it!
  
Winnie & Walter, LLC

Be sure to check out the other amazing projects on the Winnie & Walter blog. As usual, leave a comment there for a chance to WIN all of today's goodies. The Big Giveaway is also going on with a chance to win the entire release!!
   
Thanks so much for looking!
-Kelly

Thursday, November 17, 2016

Winnie & Walter Release Day 3


If you're looking for the Calling All Sistah's Blog Hop, please click here.


Hi folks! Welcome to day 3 of the jam-packed Winnie & Walter release! I rarely use earth colors on my cards, but when looking for a patterned paper to make the earth out of, this is what I found, so I went with it. Love, love this set of sentiments! I didn't count, but there have to be close to 30 phrases, and they are all fabulously scripty. The wide banner is from a set called Framed (which also has a coordinating set of cutaway dies) and it includes several leafy branches to spice up whatever sentiment you choose. I'm hoping the bird I have on here is a dove to go with the "peace on earth, joy to the world" theme.


The world is made from a set of circle tag dies that have tiny dot details along the edges ... can you see them here? Love that! How much better than just a plain circle? I added some sequins for made-up points of interest on a map to pretty-up this very cream card.

  
Like the card that you'll see tomorrow, this card is made up from four different sets, and look how well they all go together! And how well they fit on this panel. We've got more big, bold words, as well as some sentiments in different fonts, like the "from our family" here. Sentiments in small-sized fonts are totally over-rated, I think. It seems I'm always looking to add a little something more, but unless it's tiny like this it often won't fit by the time I'm done with the card design. So frustrating.
     
  
It was a late night, but I often push myself to create whatever I need to while the supplies are out, especially while the stamps are already lined up on your blocks, the ink pads are picked, covers are off, etc. In this case, I thought to make personalized cards for the Christmas ornaments we send our nephews and nieces in Texas each year. So happy to be done with this project, as I'm always rushing to beat the cutoff date at the post office because I neglect to allow for the proper transit time needed. I told Shay I was so happy to see the "from across the miles" sentiment, as that's exactly what I needed for these long distance gifts. Really happy with how these came together!
 
Winnie & Walter, LLC

 
Be sure to check out the other amazing projects on the Winnie & Walter blog. As usual, leave a comment there for a chance to WIN all of today's goodies. The Big Giveaway is also going on with a chance to win the entire release!!
   
I have another project to share with you tomorrow, and it's something outside my comfort zone : )
  
Thanks for looking!
-Kelly

Calling All Sistahs Hop


Hi Folks! I've got a hidden message card to share with you for the CAS-ual Fridays Calling All Sistahs Blog Hop today. I used two of the Ruffled Ribbon dies as clasps, adhered behind the card.


Then once you open the ribbons, you see the sentiment inside! I really like how this one turned out! The sentiment is a mix of Powerful Words and Be. On the top and bottom of the panel I stamped a portion of a border from Zigs and Zags.


Here's what it looks like from the back side in case you're having trouble picturing it. I was so excited when I found the dimensions were just the right size to meet up in the front! It's fun to play around in the craft room, right?!

You may have come from Kara Stainbrook's blog. If you'd like to start at the beginning of the hop, head on over to the CAS-ual Fridays blog. Perhaps more importantly, this is your monthly reminder to check yourself and/or schedule a mammogram if you're due for one. They really make it so easy to get a mammogram these days ... many places offer same day appointments, quick results, and I just heard (after scheduling my own appointment last week) that they now have 3D mammograms to be even more diagnostic. Wow, how awesome is that?

Should you be interested in purchasing anything from the Calling All Sistahs line, 50% of the profits  are donated to National Breast Cancer Foundation. You are also invited to participate in next month's blog hop. Check out all the details at CAS-ual Fridays, along with information on prizes.

Don't forget the discount code KELLY2016 to save 15% off your purchases! 
   
 
Your next stop is the fabulous Kimberly Rendino who always has something fun to share.
   
Thanks for stopping by!
-Kelly

Wednesday, November 16, 2016

Winnie & Walter Release Day 2


Hi folks! Have you seen all the new stamp and die sets being released at Winnie & Walter this week?!? It's seriously one of the biggest releases I can remember, with four days filled with exciting products and projects. This card is made using parts of sentiments from no less than FOUR different stamp sets. Look how well they all go together!
  
   
 The background was a hoot to make ... it's from the Harleen Creative Screening, where I sponged ink through the stencil. The first time it makes a really subtle diamond pattern, but then when you shift the stencil and use a few different colors, you get this festive striped background. Really loving it.


On this card I used the same stencil, only with two different colors. The offset pattern is just lovely! Working with the popular Faceted Diamond from a previous release, I made an engagement ring with the circle tag cutaway dies. That subtle dotted pattern on the circle makes me swoon, and it's highlighted even more on this foil paper.

  
Another cheer for small sentiments. An engagement card with a comically oversized engagement ring like this (and with a vibrant background like this) does not need a sentiment distracting from the overall design. So it's nice to discretely add it on the edge of the diamond.

Winnie & Walter, LLC
  
 Be sure to check out the other amazing projects on the Winnie & Walter blog. As usual, leave a comment there for a chance to WIN all of today's goodies. The Big Giveaway is also going on with a chance to win the entire release!!
   
Please stop by over the next two days for more projects from this jam-packed release! 
  
Thanks for looking!
-Kelly

Holiday Photo Card Blog Hop!

  
Hi Folks! It's Christmas card production time at our house, about a month earlier than usual thanks to the Holiday Photo Card Blog Hop that Darlene asked me to join this year (thanks Darlene!) I've completed a few different prototypes, but before true production starts for the 100+ Christmas cards we send out, I'd love your help selecting which one to go with.
    

I always find it interesting and helpful to learn the background on big projects like this, so before we get to the actual cards, let me share my process. Last year at Walmart I was shopping the 75% off Christmas aisles and found these boxes of flat, red glitter wreath ornaments. At the regular price of $3.00 for 12 they were too expensive, but at 75% off they were only 6 cents per ornament. Now we're talking! With the hole in the middle I could turn this into a Christmas photo card!


I'm famous for having grand plans for sale items, flea market treasures, goodwill store finds, and then either forgetting about them or never get around to making something with them. This time, however, I was smart and I packed the sale boxes of ornaments away with my Christmas ornaments, CLEARLY LABELED so I would see them and remember why I bought them. Guess what, it worked!

The card couldn't be simpler to make, and that's very important to me since I have so many to send out. It's no fun being holed up in your craft room all December mass producing cards! The basic premise is to hot glue a photo behind the wreath opening. It's a photo, a card, and an ornament, all in one! I did have to modify the wreath slightly, since the ribbon tails hanging in the center blocked the photo. Don't let something like that stop you from taking advantage of a drastic clearance like this, as once I played with the ribbon tails they easily snapped off.

Now it's a matter of choosing which embellishments to use on the wreath.


The first version has a red gingham ribbon hot glued to the wreath, as well as a Joy die cut from Winnie & Walter's The Big, the Bold and the Merry Cutaways. The photo has a lot of blues, so the festive red and green colors need to come from the wreath.


This is the most mail-friendly version, as it just has a silver foil die cut ribbon from Winnie & Walter's Essentials: Noel Cutaways. Since the photo has so many greens in it, and the wreath is red, I didn't think it needed much else to be festive.
  

The last version version features another clearance item ... a 90 foot role of ribbon that was 90% off at Hobby Lobby, bringing the price down to ONE DOLLAR. That's less than a penny per card, folks! The downside is that it's thicker than I'd like for mailing, since it's such a wide ribbon. To cut down on the thickness I just gathered it in the middle instead of tying an actual knot and secured it with wire. The ends of the wire were perfect for securing it to the wreath so I didn't need to use hot glue. The tag is from Winnie & Walter's Essentials: Audrey Cutaways and the tiny sentiment is from Happiest of Holidays with Evelin T Designs.


Now I need your help ... which ornament/card do you prefer? I'm also torn on which photo to use. I generally like close-up photos so you can see faces better, but there's something about the photo of us in the field that calls out to me. Please let me know your thoughts in the comments section, I would greatly appreciate it!


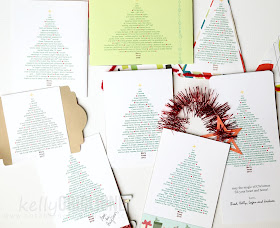
Each year on the back of the photo card I make a year-in-review word tree. In addition to keeping people updated on what happened this year, if they want to know, it will also serve to hide the back of the photo. Personally, I like having this for myself so I can remember what we did this year!
 
Here are a couple tips for making your own holiday photo cards that I've learned along the way:

- take your pictures early so you have plenty of time to order them online. Aside from generally being more expensive, most in-store places have lower quality and can only print glossy photos (not matte)
- don't forget to determine what envelope size you'll need...if it's not a standard size it may be more expensive and/or take longer to order.
- consider things that will increase the postage required in the US...like using square envelopes, having the address go on the short side of the envelope (portrait), having the card too thick. 
- the post office has yelled at me for putting the return address on the back of the card, but so far I have not experienced any service difficulties.
- invite a friend over to help you assemble. be sure to return the favor, or treat for lunch : )
  
Also, here is a gallery of all the photo Christmas cards I've sent out each year, for even more ideas. It was fun for me to see how our family has grown throughout the years! I have a dear friend who tells me she's kept each card and puts them out every year on her mantle, how sweet is that?!

2005 - sew a tiny pocket and stick a photo tag inside

2006 - incorporate the photo into the message of your card


2007 - make a photo card that pops up and folds flat
2008 - make a tri-fold card, and capitalize on a funny
picture with a humorous message inside

2009 - print your sentiment on clear acetate so the photo inside will show through
2010 - have your family hold letters to spell out a message, like "joy"
2011 - cut an interesting shape for the base, then add your photo as a flap in front
2012 - use Silhouette to cut out "merry," showing the photo inside
2013 - add glitter patterned paper and mail in a legal sized envelope
2014 - use dollar store wire garland to hang photo mounted on chipboard
2015 - use a die cut word as a stand
   

And here are the backs of all the cards, a decade's worth of updates on our family : )

If you'd like more information, there are posts on my blog for the 2012 and 2015 Christmas Cards.

Now back to the blog hop, shall we talk prizes?!

·       Two yearly subscriptions to LiveLoveCards.com
·       $25 gift certificate to Simon Says Stamp
·       $25 gift certificate to Ellen Hutson
·       $30 gift certificate to Altenew
·       MISTI (or mini MISTI!) from My Sweet Petunia
·       $25 gift certificate to Paper Smooches
·       $25 gift certificate to Lawn Fawn
·       $25 gift certificate to My Favorite Things

Winners will be selected at random from the comments left on each blog hop stop.  Be sure to leave a comment on each stop to increase your chances to win!  Leave your comments by Tuesday, November 22, 2016, 11:59pm CT.  Seven winners will be announced on LiveLoveCards on Wednesday, November 23rd, just in time for Black Friday!

Here is a list of the stops you'll be sure to find a ton of photo card inspiration from:  

Thanks for stopping!
-Kelly

Tuesday, November 15, 2016

Catherine Pooler's New Foundations Box Blog Hop


Hi Folks! I know many of you are avid stampers and may have been doing this for quite awhile. If not, you're at least very crafty and are passionate about making things for yourself and others. Once you start sending your amazing handmade cards in the mail, after your recipients finish gushing over them, I'm sure many of them ask you how they can get started themselves. Without spending a fortune. (ahem)

Well, good news is here! Catherine Pooler Designs has just released a Foundations Box which contains everything one would need to create dozens of gorgeous cards. Five ink pads (more about these later!), three stamps sets, scored note cards, and an acrylic block. It's all available for $67.

 
Not only that, but it comes in the cutest little blue box you ever did see. Talk about gift-giving made easy ... you don't even have to wrap the darn present!!

PS. This also makes a fabulous gift for yourself! Go ahead : )

Enough chatting, let's take these goodies out for a test drive ...

  
These first few cards are all one layer, and are made using ONLY the supplies included in the box. This birthday card uses a post-it note (or a piece of paper will work too) as a mask to blend the blue ink on the bottom of the card. There is also a mask over the red circle to make the card look like it has a few layers. No actual layers here! Just a little pre-planning.


I was so delighted making this card when I saw how BEAUTIFULLY the ink blends! Catherine's been working on a brand new formula for these inks, which you can't buy anywhere else. They are foam pads, like the old pigment inks, but they are still dye-based inks. There's a video that explains these. They are so darn JUICY, the ink is plentiful, and coverage is a dream. I honestly prefer using these inks to blend more than the distress inks now. They are just that good.


The day I got my package in the mail I tore it open and sat down to create this card, accepting Catherine's challenge to keep the card one layer and not use any other supplies. The oval mask is actually the shape of the ink pads! I just traced it on a sheet of copy paper, cut it out, and then started stamping flowers and leaves around the outside edges to get that framed look. Seriously love the orange, green and blue color combo.


This card has a lot going on but is still very flat for mailing. I used the same post-it note from the first card to make a icy blue ground for my tree to grow out of. The tree is inked completely in green and then before stamping it I dipped the top and bottom sections in the blue ink. Second generation stamping comes into play to give dimension to the snowflakes falling, as well as some added glitter from my kids' art bin.


Another take on a holiday card, with the sentiment topping the tree, and a festive ground from overlapping the diagonal stripe ribbon stamp.


Finally, remember how I said I loved using these inks more than distress inks for blending? Exhibit A right here. Can you believe these stripes are just from blending the ink, using post-it notes for masking?! Crazy! Incredible!! AND, let's talk about coverage when stamping solid images. Those large black flowers ... ONE stamp and done. No white spots, no lighter spots, just an even sea of black ink. Gah! The other benefit? As much as I love my MISTI, I didn't need it! Just good old fashioned taping the stamp in ink and putting it on paper. I seriously couldn't believe it. Each time I use these inks I feel like I'm cheating. No banging the stamps into the ink pads 10 times, no using super-human strength pressing the stamp into the paper, AND the images turn out amazingly well. There are only two drawbacks: 1) your fingers get messy and you have to make sure that doesn't transfer to the card you're making, and 2) your stamps get stained using the red and black inks. I absolutely can live with that. I honestly get so much joy using these inks. I was working on another project yesterday and got very annoyed at my old inks. Can you tell how much I love these inks?! Hahaha ...
 
   
 OK, want to win a box? All you need to do is comment on the posts in this hop, and in yesterday's hop. A box will be given away for both days, with the winners announced the next day.
  
You're next stop is the lovely Lisa Harrolle.

Here's the complete blog hop list for today:
Kelly Griglione <-you're here!
Melissa Miller  

Thanks so much for stopping by!
-Kelly