Sunday, September 1, 2019

Altenew Build-A-Flower: Hellebore Release Blog Hop + Giveaway


Hi Folks! Back to school, back to the craft room!! Amiright?!? So excited to kick off being back in the craft room with a fabulous Altenew Blog Hop ... the latest Build-a-Flower Hellebore is just gorgeous! You may have just come from the blog of Reiko Tsuchida, but if not you are welcome to start at the beginning with the Altenew Card Blog.


http://shrsl.com/1sach

This new set has two flowers, one bud, and three different leaves so you can really vary the bouquets you create. Let's take a look!


I wasn't familiar with the Hellebore, so I did a google image search and found these flowers are usually white, or really dark reds and purples.


So glad, as I normally would not have gone that dark, and I'm pretty happy with the result. It reminds me of a vintage seed packet, especially since the reds are a little more muted vs. vibrant.


After stamping the flowers, I went back and added details and shading with colored pencils. A first for me! Yay! I shaded on each end of the petals, and then added shading and dots to the centers.


Some shading for the background, with a few gold spatters, and a b&w sentiment. The flowers are so pretty that if you just put several on a card, you know it's going to look good!


A quick word about the leaves ... unless I have an efficient way to stamp them, I tend to get lazy and skip the leaves. What a shame! Once they're on the card I think they add so much to it. So one way I cut down on time is to arrange the first solid layer of leaf stamps on a stamping block, and stamp them on a scrap piece of paper. Then, on the paper, I arrange the second layer of leaf stamps face down. When they are in place, I put another stamping block on top of them. Same for the third layer of stamps. I arrange them face down where they belong on the stamped piece of paper, and put a stamping block on top. Now I'm ready to stamp three times, and have three triple-layer leaves!

Not pictured are my dies, which I also arrange on top of the stamped piece of paper and tape together. Then I can cut all three leaves at the same time.


Back to the cards, my second project is a beautiful "vase" of flowers. I say "vase" because I've totally cheated, and really my vase is nothing more than a gray rectangle! But I think it gives a modern edge to the card.


The background is from the Molded Lines stencil. The sentiment is from the Pen Sketch Mandala.

I love having the buds in this set. Sometimes you want to add another flower, but it would take up too much room. Like on this card, I originally had two blooms, wanted a third to have an odd number, but there wasn't any more room. Three little buds were the perfect size, and they also added up to an odd number. It was also another great way to get a darker shade of red in there.


Since this was a more modern card, I didn't shade the petals with colored pencils like the other card, but I still added some details to the centers.


This is such a great set for creating big, beautiful bouquets. I really like that you can use it to make a traditionally beautiful card, or a more modern, clean card. 

If you're not sure you have enough shades of each ink color for the Build a Flower set, you can also purchase the set with coordinating ink cubes at a 5% discount.

Subscription Plan:
There is also a monthly subscription plan for the Build a Flower sets! When signed up, you are guaranteed a spot in the monthly Build a Flower releases (which often sell out) and will receive the stam and coordinating die at a special discounted price ($35.00 -> $29.99). See Altenew site for further details.


Prizes: To celebrate this release, Altenew is giving away a $30 gift certificate to 6 lucky winners! Please leave a comment on the Altenew Card Blog for a chance to win.

We'll also draw a winner to receive a $15 gift certificate from the comments left on each designer's blog. All winners will be announced on the Altenew blogs on 9/7/2019.

Now I am very happy to send you to the blog of my dear friend, Virginia Lu, who no doubt has put her heart into something very special to share with you!
 
Thanks so much for stopping by. If you enjoyed your time here, I'd welcome you to follow me on Instagram for all my latest projects!

-Kelly


Supplies Used (with affiliate links at no additional cost to you. Thanks so much for your support!!):
BAF Hellebore
BAF - Hellebore

Tuesday, August 27, 2019

Tips on Building a Background


Hi Folks! I'm happy to share a card I have on the Evelin T Designs blog today! This card just uses one small stamp from the Reading Buddies set. Stop by and check out my tips for using any smaller stamp in a set you already own to build a background. It's a great way to stretch your stamps and gives you a totally different look!

Thanks, as always, for stopping by!!
Kelly

Friday, August 9, 2019

Essentials by Ellen August Release Blog Hop


Hello, and welcome to the Essentials by Ellen August Release Blog Hop! You may have just come from the "mother" of all these adorable bears, ghosts, santas, etc. .... none other than Julie Ebersole! What a release she's created!! If not, feel free to start at the beginning with Adelina Starace.
 
We've got Halloween!
We've got Thanksgiving!
We've got Christmas!
We've got Bear Ware!!!!!

Want to take a peek?


Not only is there new Bear Ware, but there's an actual NEW BEAR! What?!


Isn't this little guy so cute taking the hand of mama bear (or on his own he'd be able to hold something up, like a birthday cake, or even this pie!) The pies included in this set are fun to use too ... says the person with the biggest sweet tooth ever. 


Having a wagon included in the Bear Ware 4 set is big-time ... all the different things you can put in it make it so versatile. Pets, kids, the top of the little bear, or just all the misc. die cuts from a set, like the gourds and leaves here. It's like a giant invitation to add more to your card.

The sentiment is from the Last Bite set, which is meant for Halloween (think vampires), but it totally fits here with the pies! And then I stamped a few "gobble, gobble's" by our cute little pie-eater. Finally, the border of the card is a strip I cut from the new Rustic Woodgrain background stamp, which you'll see more of later.


Next up is  an adorable Halloween set Happy Haunting with the cutest illustrations by Julie Ebersole. How darling are these two cuddly ghosts?! Just perfect for the sweet sentiment ... You're my Boo.


The Spiderwebs die is such a great addition as a background for any of your scary or cute Halloween scenes. Especially if you cut it with silver glitter paper!


And here's another look at that Rustnic Woodgrain background that you saw as a strip on the Bear Ware Thanksgiving card. I'm pretty sure I'm going to be using this one all the time!
 

Before we get to this card, can we just have a moment to applaud this sassy sentiment? Hahaha!! This sentiment, and the "You're My Boo" sentiment on the last card, are from Pumpkin to Talk About.

Aside from the cuddly ghosts, there are other cute creatures of the night in the Happy Haunting set like this little bat with the jack-o-lantern like grin. Give him a hat from this set, and a broom from the Bear Ware 2 set, and he's now a sassy witch.


The background was made by smooshing the Catherine Pooler inks on a stamping block and dropping water before pressing it onto a paper. The stamping block is what gives it that nicely uneven, but still controlled, rectangular shape. 


Added a few sequins and mounted the panel on a white card base. 


These are just two of the cute Halloween critters in the set ... be sure to check out the others!! And they also have coordinating solid colored stamps if you want to quickly color them in!


Finally, the Holiday Characters are just as cute as the Halloween characters, only there are a lot more of them! For this card I really wanted to give the illusion of a sleigh, so I stamped the presents on the card base first, layered a die cut of The Big Guy, and finally added the reindeer in front, pulling the sleigh.


Love how this looks like a sleigh scene, yet there is no illustration of a sleigh anywhere!


The sentiment is from Retro Holiday Greetings and it's just perfect for the outside OR inside of your card. Often the holiday sentiments I have are great for the outside of a card, but if they're just one line, or on the smaller size, they look a little lost on the inside of a card. This sentiment, along with seven others, take up a perfect amount of space on the inside. 


Here's another of the cute characters and another Retro Holiday Greeting ,,, certainly he's a "nice" elf. These Shipping Tags are also part of the release, and the good news is that they cut FOUR tags at once! This makes it so much easier for mass producing present tags, or even for individual tags to layer them up like on this one where I have a pink woodgrain tag beneath the elf. I always like to have two layers of tags for that extra bit of color and texture you can add. And any personal messages as well.


Again, be sure to check out the Holiday Characters set to see all the different characters included in the set.

PRIZES: We've got super fun prizes!!! One random & lucky commenter will win $25 to the EH shop and one will win the whole August Essentials by Ellen release!!! To enter for a chance to win, make sure to leave comments at each stop along the hop. Comment before Thursday, August 15th at 11:59pm PST. Winners will be notified by email.


I have the pleasure of sending you off to the hilarious Laurel Beard, who is surely the quickest marker-sorter you'll ever meet (as demonstrated at Creativation this year)!

Thanks so much for stopping by!
-Kelly

Thursday, August 8, 2019

Altenew August 2019 Stamp/Die/Stencil Release Blog Hop + Giveaway


Hello, and welcome to the Altenew August Release Blog Hop! You may have come from the beautiful blog of Sveta Fotinia but if not, feel free to start at the beginning with the Altenew Card Blog.

Once again, I've got several cards to share with you ... these Altenew releases are always packed with so many goodies it's hard to stop!


http://shrsl.com/1qq52

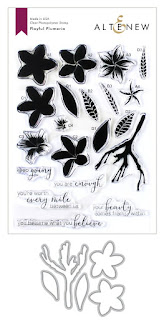
This Playful Plumeria set is perfect for anyone who loves the look of the layered build-a-flowers but may be intimidated by lining them up. As you can see, there is a clear space between the uniformly-sized petals for the second and third layers, which really takes the guesswork out of where to stamp them. Let's take a look at two cards with this set, one with the corresponding dies and one without:


The corresponding dies on this set really come in handy since the flowers are meant to overlap when you stamp them on the branch, avoiding the need for a lot of masking. I wanted to go with a more muted color scheme which could be used for a sympathy or encouragement card, so I chose a mint for the base of the flower, and added the pink and red details.


Even though they're muted, they look so cheerful! The edge is stamped with my favorite triangle background stamp from the Pattern Power set and the sentiment is from the Dahlia set.


This card is done without the corresponding dies, and, aside from the sequins, is a one-layer card (ok, well, I guess it's also mounted on a gray card base!) These flowers are stamped in greens with a seafoam blue accent in the middle. To fill the spaces I used one of the smaller stamps from the Vintage Flowers set, but you could really use any small floral or patterned stamp here.


I appreciate that there are a lot of useful, and slightly different, sentiments included with this set. They're also graphically pleasing with one of the words highlighted in script.


Two different looks for this set.

2. Wonderful Wycinanki


The Wonderful Wycinanki set surely has limitless combinations of designs with all the elements which are included. There are two main floral images with stamps for each layer of color, a layered leaf, a smaller layered flower, a leaf base, and several squiggles. And a ton of sentiments.


You can definitely create your own pattern with these elements, but for this card I went with a focal point of three stylized floral images. To highlight the different shapes of color within each flower, I chose contrasting colors so they really stand out.


Although it's a simple (and again one layer) card, there's a lot going on with these detailed shapes. I definitely need to revisit this set soon, as there are so many other different ways to use it. It seems a shame I only have one example here. But, that's probably because I went a little nuts with the next set ...

3. Simply the Best


The combination of a large, bold bloom, with all of those fabulous sentiments, make the Simply the Best set my favorite from this release. Get ready, I've got four cards to share from this set!


"Wow!" is right! Love the size of this floral and how it totally carries the card on its own. Like the Plumeria set, this one is super easy to line up. Also like the Plumeria I stamped the base in a mint color, and then layered on a plum and a navy for accents.


The sentiment is stamped in that same navy, and then with a bright chartreuse, which is repeated in the center of the flower as well as the stenciled bottom of the card. I shifted the Feeling Dotty stencil to get the two-toned dots. So much use out of that stencil!


This card uses the coordinating die and only one of the three layers for a completely different look. Offsetting two of the detailed layers makes for a really cute flower.


The nice thing about using the coordinating die is that you can bend the petals up for a ton of dimension. The kind of dimension that conveniently flattens down for mailing.


The main sentiment is stamped with two different colors, and then I added a secondary sentiment from Sentiment Strips. You'll notice the triangles from Pattern Power also make an appearance here. Finally, I added some leaves from Sunflower Daisy.


With all the awesome sentiments, I felt like I could make a card (or two) that just feature THEM! I'm not sure if this was intended, but I was tickled to see how I could basically write a paragraph by stringing four of the phrases together.


The border of the card is stamped with the main floral image. I love how you can really change up a card while using the same sentiments and flower.


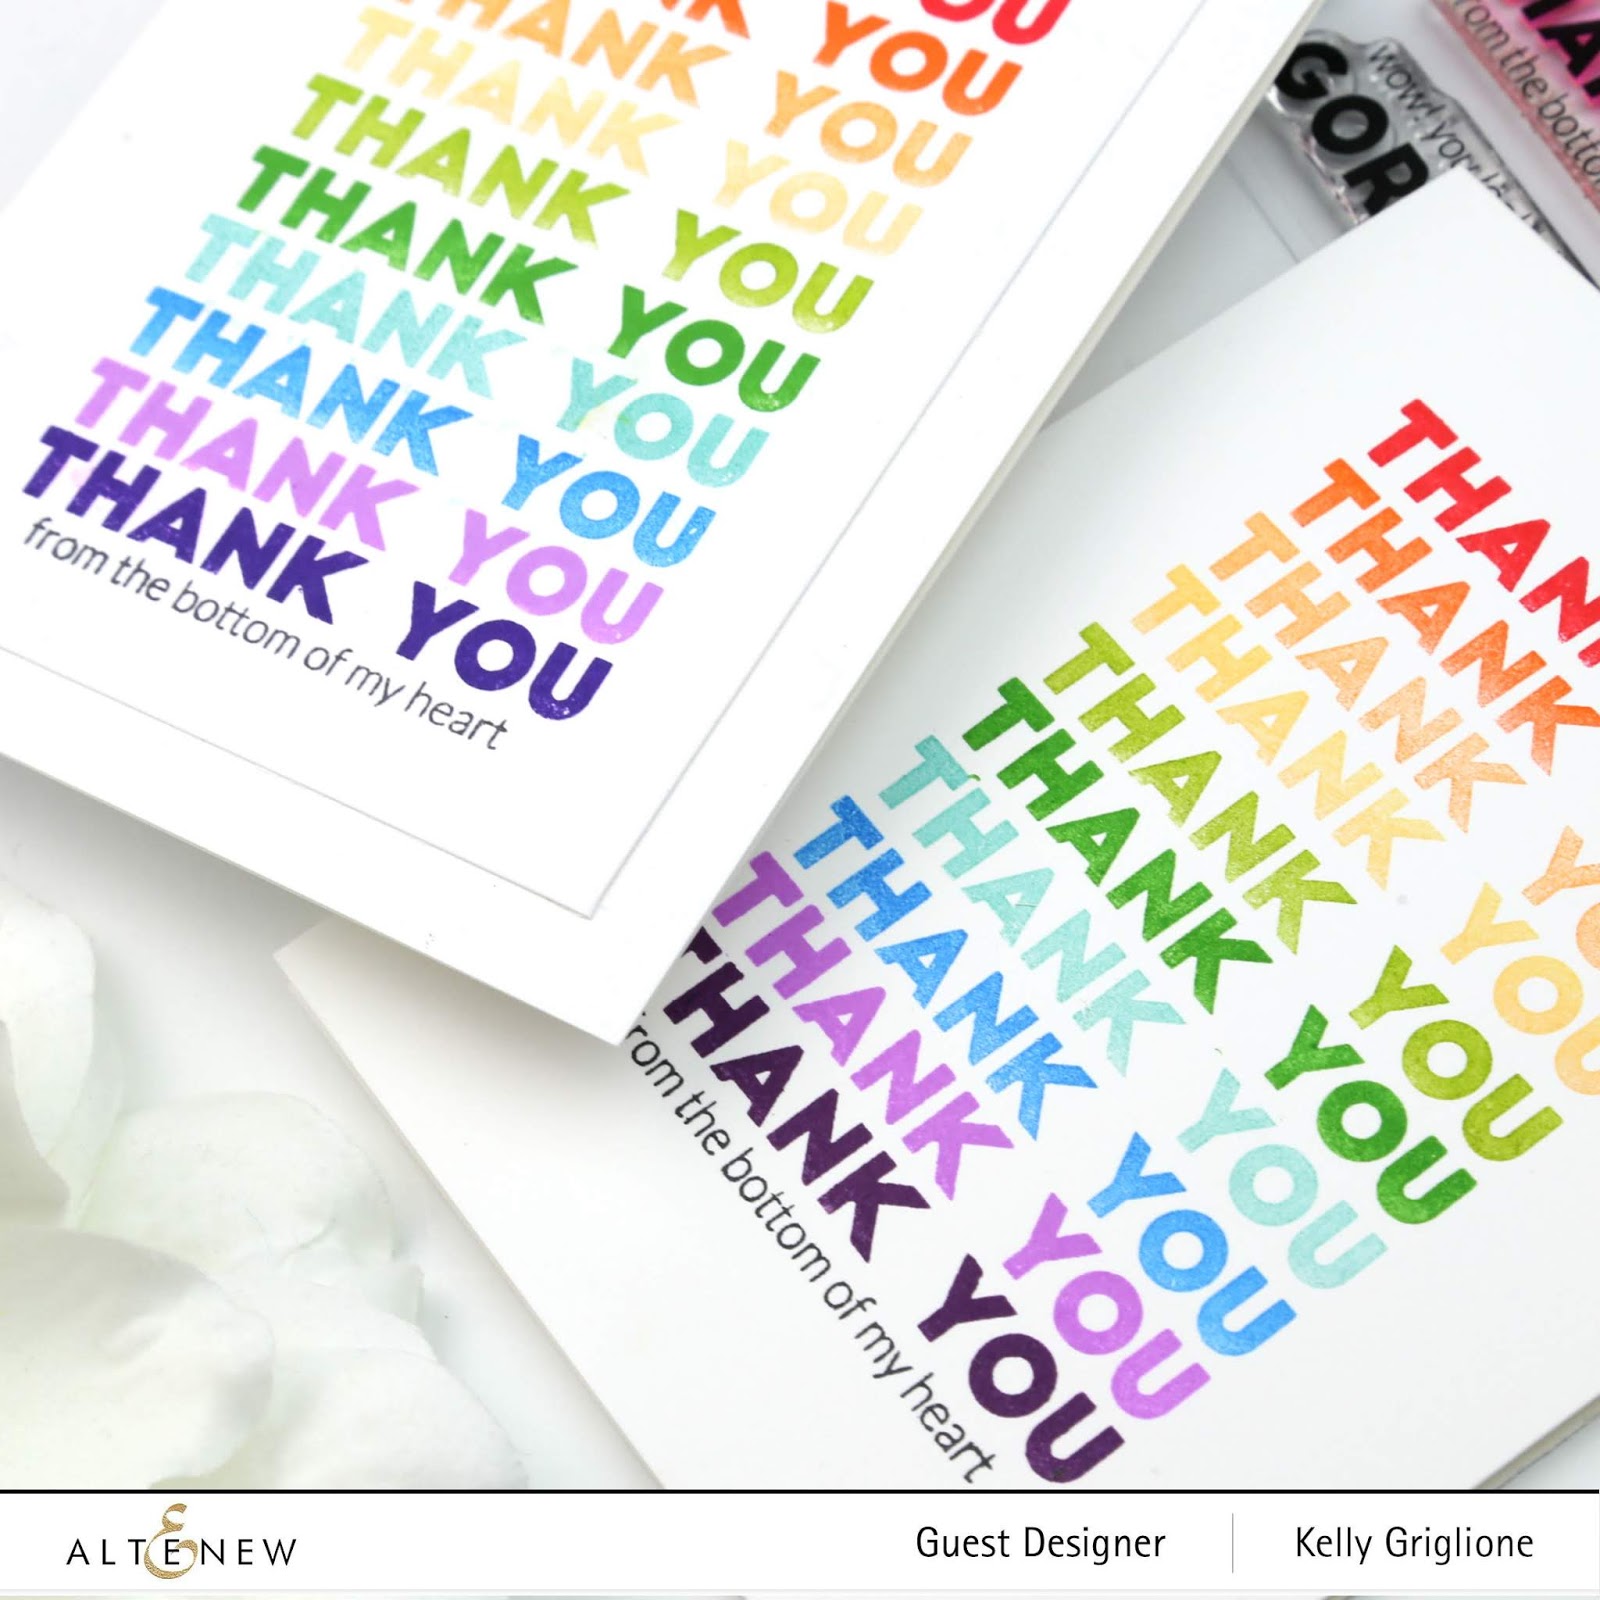
For my final card I decided to focus completely on the sentiment, without a floral image. You just can't go wrong with a rainbow. The thickness of the font used for "thank you" is perfect to get a lot of color on your card.


You could really do this with any of the six sentiments in this set. Lots of options!


And there you have it, no doubt how much I love this Simply the Best set! I honestly could have kept going : )

As you know from this blog hop, the August release is chock full of fun sets to play with, many of which I haven't even shown here. Feel free to check them all out!


Prizes:
To celebrate this release, Altenew is giving away a $50 gift certificate to 6 lucky winners! Please leave a comment on the Altenew Card Blog and/or Altenew Scrapbook Blog by 8/14/2019 for a chance to win.


We’ll also draw a winner to receive a $20 gift certificate from the comments left on each designer’s blog on the blog hop list below. All winners will be announced on the Altenew blogs on 8/17/2019.

Your next stop on this hop is Enza Gudor with something wonderful to share with you!

Thanks so much for stopping by!
Kelly


Supplies Used (including affiliate links; thanks so much for your support!!):

http://shrsl.com/1qr72
Playful Plumeria Dies
http://shrsl.com/1qq52
Playful Plumeria Stamps
http://shrsl.com/1qraq
Wonderful Wycinanki Stamps
http://shrsl.com/1qrwu
Wonderful Wycinanki Dies

Simply the Best Stamps
 Simply the Best Dies
Simply the Best Dies

http://shrsl.com/1qrx0
August Bundle


 http://shrsl.com/1qq55