Monday, July 30, 2012

Orphaned Earings


When I was playing around with hexagons for the challenge at Moxie Fab World, I thought it would be neat to cut out the inside of one and use it to showcase some sort of charm. Only I didn't have any charms that small. Then I remembered some orphaned earnings in a bag of old costume jewelry I got at a flea market years ago. Perfect. Right size, good quality.


And I was happy to recycle them.

Wire cutters removed the post, but I left a little bit so I could poke them through the background and attach them to the card.

The colors are inspired by those at The Play Date Cafe this week. Not ones I've used together before, so I'm happy to participate in this challenge.


The layout is from the Less Is More challenge:


Thanks for looking!
-Kelly


Supplies used:
stamps:  PTI hexagons, PTI dress form
dies:  Memory Box delicate chain, PTI fillable frames
ink: PTI raspberry fizz, Color Box yellow ochre
other: earings

Saturday, July 28, 2012

70th Birthday Banner Cake

I wanted to dress up my mom's 70th birthday Angel Lush cake, and was inspired by all the cute cake photos with banners like this one from Technique Tuesday (Not completely sure if this counts as a "paper project," but there is paper on it.) I'm always excited when I can use my stash on things other than cards. Makes me feel like I'm getting my money's worth just a little more : )


It was so quick and easy to do, and Mom was really surprised when she saw it. She loved it.
 

For the banners I cut a long strip of paper into 2" pieces, and notched the ends with scissors. They're held up with baker's twine tied between two bamboo skewers. For the "70" I glued toothpicks to the back of the die cut numbers so they would stick nicely into the cake.

NOTE, if you try this, be aware of how close your candles are to the PAPER banners!


We had a little extra excitement.


See the smoke coming from the banners? And how the banners were swatted AWAY from the lighted candles? Yep, one caught on fire. My son was impressed.

The cake was also very light and tasty, perfect for summer gatherings. I've had requests for the recipe everywhere I've taken it. Bonus that it's quick to make since you use store bought angel food cake. Here's the recipe from Kraft if you're interested:

Angel Lush Pineapple Cake

1 can (20 oz.) crushed pineapple, undrained
1 pkg. (1.5 oz) vanilla instant pudding
1 cup Cool Whip
angel food cake, sliced into 3 layers

Mix pineapple and dry pudding mix. Fold in Cool Whip (the recipe calls for 1 cup, but I use the whole tub.) Place bottom cake layer on plate, spread with 1/3 of the Cool Whip mixture. Repeat two more times. Can add strawberries or other fruit on top, but it's still delicious without it.


Thanks for looking!
-Kelly


Supplies used:
dies:  PTI block lower case alphabet, PTI by the numbers
other: bamboo skewers, baker's twine

Wednesday, July 25, 2012

Girl's 11th Birthday [PTI Blog Hop]


Needing a birthday card for a preteen girl, I took the inspiration colors from Papertrey Ink's monthly blog hop challenge.

 Branching out a little bit for me to try a more artsy/whimsical card. After spending so much time figuring out where everything should go, I have a deeper admiration for those who make cards like this look so random.


I am in love with the PTI Simple Stripes impression plate. It give such a subtle, even texture in person, but try taking a photo and it completely disappears! I used it here on the inset "Celebrating your Birthday" panel.

The "11" sits on a cake stand and is masquerading as two candles with a wire wick and hand-cut flames. This would work well for any age, but "11" is perfect for candles! 


 The flowers are masked, and I love how the little sunburst stamp fills an area. See the text? That's a fun technique I got from Artsy Lynn to put Scotch tape on a dictionary page, and then rip it off. You get the top layer of printing so it's transparent when you add it to your card. Love how irregular the shape is too. I can see using this technique quite often when a card needs a little something extra.


It was so fun using washi tape (yellow dots on top of the cake stand.) Do you know that Target now sells 4 packs of "paper tape" under their house brand Up?!? I found out about this at Taste of Chicago a couple weeks ago. The Art Institute had a craft table for kids to create their own pop art (in honor of the new Roy Lichtenstein exhibit). And they gave them washi tape! I was strangely jealous.


And although their masterpieces looked fantastic, I couldn't help but think maybe I'll steal a few strips off their paper once we got home and they forgot about it (so wrong ... I know, I know!!) Instead, I asked where the Art Institute got the tape and that's when I found out about Target. 

The best part is, they sell 4 rolls of it for ... $4! I can do a buck a roll! I think there's a fifth "multi color" package that was out of stock on the shelf (office supply section.) I grabbed one of each and feel fully stocked now.

Thanks for looking!
- Kelly


Supplies used:
stamps:  PTI mini hexagons (pattern on the "1's"), PTI Movers and Shakers Sentiments, Pink Paisley Celebrations
impression plates: PTI Simple Stripes 
dies: PTI Mat Stack
ink: PTI Hawaiian Shores,  PTI Mellon Berry, PTI True Black, Color Box Yellow Ochre
other: wire, dictionary, Up! paper tape

Monday, July 23, 2012

Top Ten Mini Album


 Here's a cute, little "Top Ten of Summer" mini album for the Papertrey Stamp-a-Faire memory preservation challenge.


On the left will be a photo for each highlight of our summer. Then on the right are hexagons. One hexagon for each number. So the 5th best thing of the summer has 5 hexagons.


Here's an example of what it would look like (using our Christmas card photo as an example). Once summer is over I'll print the photos and fill out the album. I'm excited because it's 90% done and I'll be able to complete it so quickly. And if I want, I can add a short sentence in a thinner pen under the main description.

I didn't have a metal ring on hand so I just used a thick copper wire to make a loop for binding. I may switch it out once I get a ring, but for now it's good : )


I'm entering this in the hooked on hexagons challenge over at Moxie Fab. Such great inspiration in this post ... I pinned several ideas!

Thanks so much for looking!

Supplies used:
stamps:  PTI Lovely Layers, PTI mini hexagons
dies: PTI By the Numbers, PTI block lowercase alphas
ink: PTI Hawaiian Shores, PTI Aqua Mist, Colorbox Tangerine, Colorbox Yellow Ochre
other: copper wire, tags


Limitless Lovely Layers


It was refreshing to follow the Papertrey Conservation challenge and only use one floral stamp set. Nothing else. So I picked Lovely Layers since I hadn't used it yet.


Knowing you had to make do really kept the creativity flowing. There was no looking for embellishments, deciding on options, etc. You just grabbed it and went. Things were going so fast I created another card. And another, and another ...


First up. Two of the larger flower dies with "Enjoy" stamped around on each petal. I put the end of the Banner die through the die cutter (and trimmed the rest with the paper trimmer) to make the large blue panel.

Next card. For the larger center piece, I stamped the tip of a flower around the edge to make 4 white sections. Then trimmed the smaller center piece so only the "joy" shows from the "Enjoy" stamp.


 Moving on. To Christmas. The background is the cross flower stamp overlapped to make a trellis pattern. And the negative portion of the circle border die made the edge of the white topper.
 

Can you tell where the ornaments came from? Yep, they're petals from the large flower die! After cutting the petals, I embossed them, colored the embossed circle designs, and added some glitter.
 
 Card number four. This card uses the flat side of the star die to deboss the image. On either side of the white panel are flowers stamped on the edges to create the illusion of patterned paper behind the card.
 

The cross flower die cuts are embossed, stamped and layered. A chartreuse colored button finishes it off. 

OK, last one. This one has the cross flowers again in green, overlapped at the tips. This gives a bigger space in the middle (bigger than the Christmas card background). Big enough to stamp another flower inside. The sentiment strip is from the slot in the Movers and Shakers die set, and the blue flourish on either side of "Thanks" is the center of the flower petals.

All of this card making got me thinking ... maybe I should do this "conservation" exercise with every new, big stamp set I get. This is the first time I've used Lovely Layers, and now I feel very comfortable with using it for flowers and other things. Kind of like breaking it in. Lots of fun!

Thanks very much for looking!
- Kelly

Girl Scout Badge Card

The felt badges Heather Nichols did at Papertrey's Stamp-A-Faire are so cute I just had to make my own. I adhered several star dies to the card base to give it a tone-on-tone look, keeping the focus on the badge, but also adding some interest.


I couldn't quite remember but I think my Girl Scout badges were on a green background with yellow stitching around the edges. So that's what I did. 

I'm entering this in the Less Is More sewing challenge.

Thanks for looking!
- Kelly

Supplies used:
stamps: PTI Tin Treats 
dies:  PTI Stars, PTI Mat Stack 4
other: Green felt

Thank You Card Set


I'm always looking for good teacher's gift ideas, and it seems the one thing they use a lot is thank you cards ... for all those teacher gifts!

So that's what I did for the Papertrey Stamp-a-Faire Card Set challenge.


 Super simple, just a mat stack on top of a smaller card. The small flower from Limitless Layers fit perfectly inside the mat window. Seems I can't put that flower set down.

Thanks so much for looking!
- Kelly

Supplies used:
stamps:  PTI Mat Stack 4, Thing Big Favorites, Limitless Layers, AC grid
dies:  PTI Mat Stack 4
other: gem


Sunday, July 22, 2012

Owl with Tie Dye Eyes

Still thinking about Nichole Head's tie dye technique from the Papertrey Stamp-a-Faire.

The tie dye circles remind me of eyes. Monster eyes. Funky owl eyes.

I already had an idea for an owl card in my head so I went with that. The nose and ears are the triangles from the Banner Builder die set. Seems like I use those all the time ... most of the time for things other than banners. Very versatile, and I like how you cut 3 at a time.


 The feathers are also made from the PTI Banner Builder die. I noticed the leaf vein stamp from Limitless Layers looks like a graphic feather image, so that is stamped on all the banners/feathers.


Thanks for looking!
- Kelly

Supplies used:
stamps:  PTI Limitless Layers, MS Texture
dies:  PTI Banner Builders
ink: PTI Raspberry Fizz, Hawaiian Shores, Simply Chartreuse


Tie Dye Technique on Cards


I am so IN LOVE with the tie dye technique that Nichole Heady showcased at the First Annual Papertrey Ink Stamp-A-Faire

And, since it made me so happy to make these, I thought I'd add then to the fun, new CASology challenge.  They pick an inspiration word (this week it's ... "happy") and then you go create. Love the concept that the inspiration is a word and not an image or color.

 Here's my first attempt at the technique (basically, sponge some ink in circles and then remove the dye-based ink with a blender pen). Shocking ... the ink actually comes off! The possibilities!

But I wasn't too thrilled with how muddy they looked, especially the pink centers since it was mixed with the blue and green layers below.

So, here's another attempt. Still didn't really concentrate on completely keeping the colors clean but I loved the look so much I wanted it to take center stage so I kept it simple with one tie dye. 

 Here's one with stitching around the circles, inspired by the Less Is More challenge to sew. These colors are a lot cleaner. 

And lastly, why not cut them out? The tie dye is made from zig-zag strokes around the circles.


This is inspired by the David Chihuly installation in Vegas' Bellagio lobby. I could sit under these amazing glass creations for a loooong time.

Side note, I was so sad to miss the Chihuly exhibit at the Dallas Arboretum this Spring. We were there on a girlfriend's weekend but the exhibit didn't open until May. Check it out! Such inspiration. And I just heard that a recent hail storm damaged several of the installations. Horrors.

Back to the card. Normally, I'd try to keep the paper from warping with the water, but in this case it was just the thing I wanted to mimic Chihuly's glass. They're popped at different levels, again, to mimic the glass ceiling. I chose a black background for the CASual Friday challenge, and like how they pop.


Thanks so much for looking!


Supplies:
Stamps: PTI Think Big Sentiments
Ink: PTI Raspberry Fizz, PTI Hawaiian Shores, PTI Simply Chartreuse

Friday, July 20, 2012

Last Day at CHA

What a fun two days at CHA! 
So much inspiration, new product, learning, crafting, meeting folks, and just plain happiness!
Here are some photos ...

(Day 1 photos include celebrity sightings with Heidi Swapp and Tim Holtz)

 Entrance to the show. Die Cuts With a View on the left. They got rid of their 12x12 paper packs for $7 during the last hour of the show. I showed remarkable restraint and didn't add any to my collection.
Never too old to play dress-up! Graphic 45 encouraged folks to step into their photo booth and pose away. They did a great job dressing for their product lines each day. Kimonos, Victorian, and Halloween were the three themes. 

 Mini albums with thick bindings for lots of bulky embellishments, like the cookie cutter and spool of thread here.

Fun banner class by Petersen-Arne ... every step we were opening a new product! Martha Stewart border punch, scissors, adhesive, foam tape, ink, brushes, pearls, gems, crystals, lots of good stuff!!
 
Even without looking at any new products, it was neat just to look at the booth displays. Loving the garland, paper sheet light fixture, bird cage, and gallery of framed patterned paper (going off the right edge of this photo)

 12x12 banner made with We R Memory Keepers Lucky 8 punch. Easy to use, but not so sure about storing these ... they're enormous! They are introducing a punch for 6x6 paper that's much smaller.

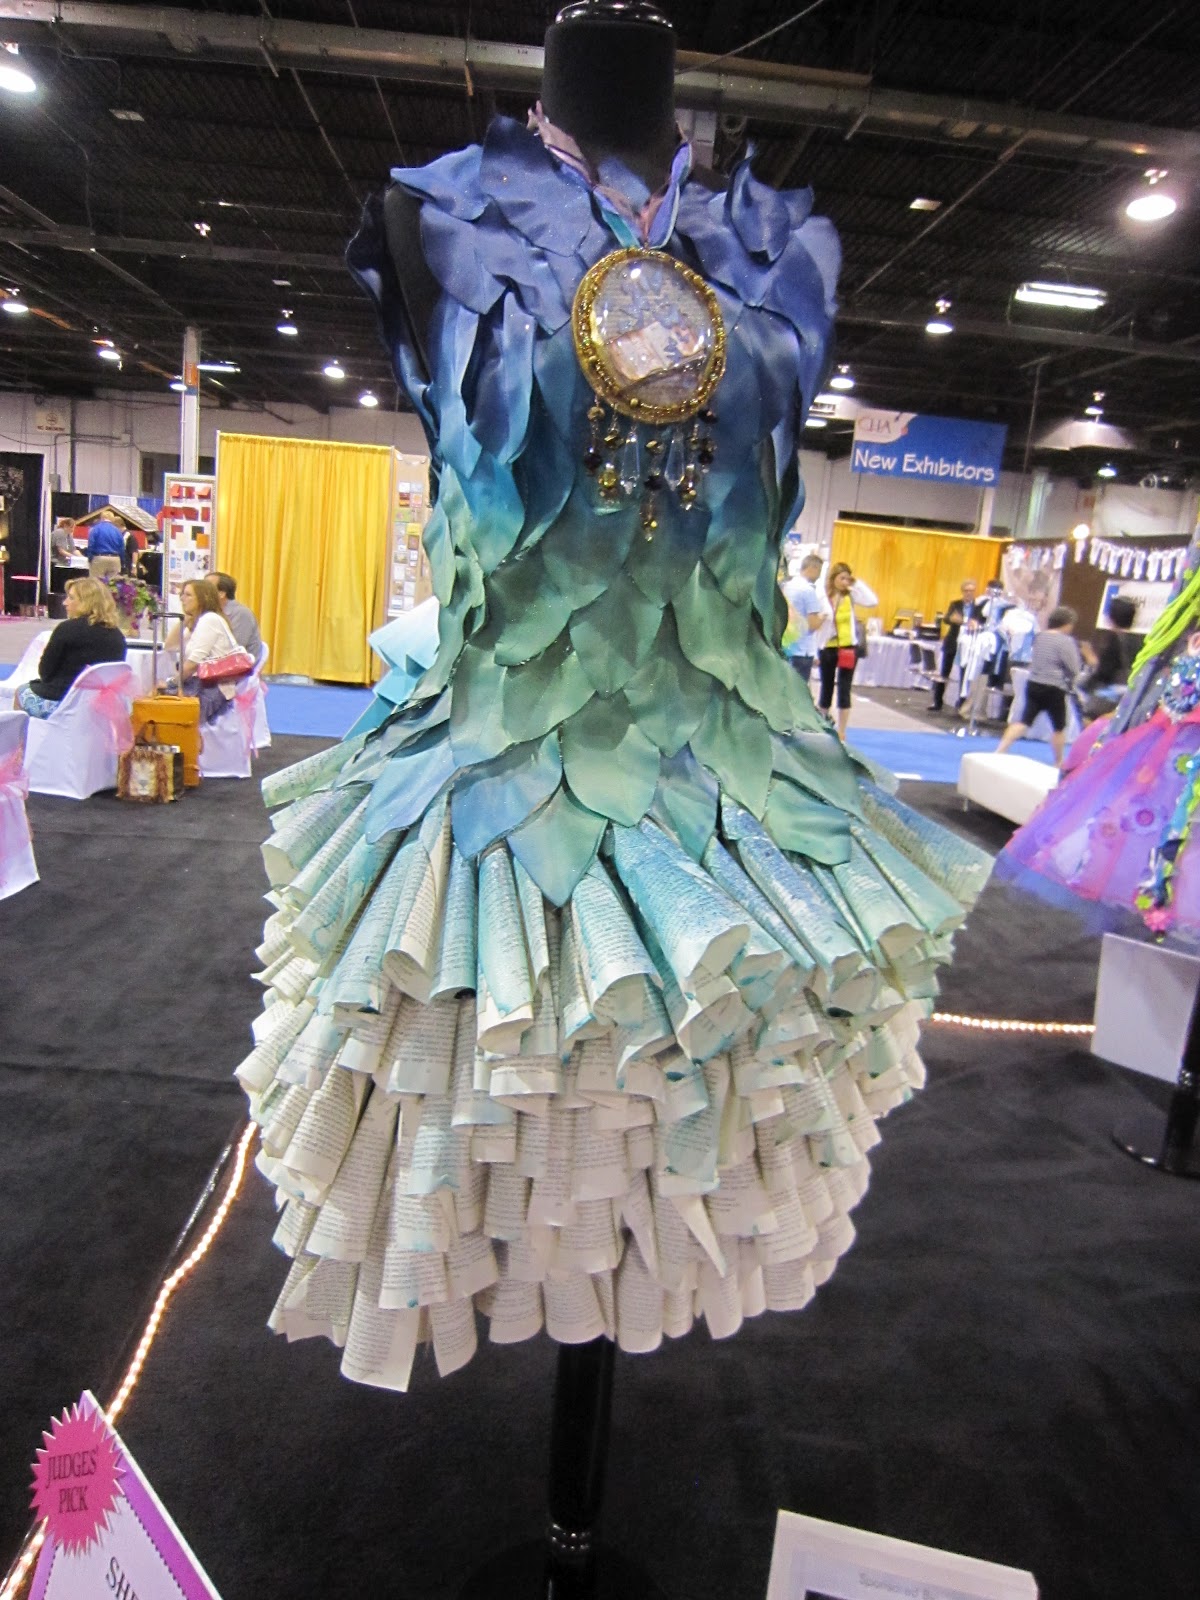
Rolled paper dress at The Next Iron Crafter stage, where contestants had 10 minutes to create a masterpiece with a surprise set of supplies.

Cute dress form at Heidi Swapp's booth, with samples of her new Color Shine Iridescent Sprays to the left in black frames.

The peach spray, on her color resist paper (so fun to play with ... we did some cool ombre samples with Heidi. used lots of spray, let it sit, blotted, and buffed. very intense color!)

 DoodleBug color lab ... they all had lab coats!

Me snapping away.

Studio Calico funky flowers on display.

More of the Studio Calico display ... tissue paper rosettes in an apothecary jar. Love things en masse!
 
Crate Paper booth with a fun rosette of their 12x12 paper.

Amy Tangerine's booth with a masked sentiment globe that I've been seeing on Pinterest

... and some good old fashioned string art!

Framed galleries are popular, like this one from Pebbles with some printables mixed in.

I must have been under a rock because I had not heard of Dyan Reaveley. She is a Senior Designer for Tim Holtz and just short of amazing. She has a 3-4" thick vintage ledger book that she has turned into a jaw-dropping collection of altered art. After flipping through 40 or so pages my head hurt, it was so overwhelmed with trying to absorb the details. And listening to her colorful musings in her British accent is a hoot.

Here she is (the red-head in the skull scarf) with Tim Holtz next to her. Even more amazing is the lightening speed that she produces these masterpieces. She's releasing some fun stencils, stamps and journals for Fall.

More DCWV, see the purple skeleton at the head of the table waiting for dinner?

I wasn't thinking. Totally should have had Elizabeth Kartchner sign her new book (that I got from the Northridge Publishing booth ... thanks!) And could have asked Heidi Swapp to do the same (again, thanks Northridge!)


Bella Blvd made these super-cute Hershey's Kiss flags. How fun would these be for a party?!? And easy! Get a pearl pin, wrap a themed paper (or one with a custom message like "Happy 30th!") and stick it in the chocolate. Have them all on a tiered cake stand, or unwraped on top of other treats.

Can't wait to get a hold of my Silhouette and start cutting fabric, like this adorable elephant mobile!

What's not to love?

Quick side trip to the Jewelry and Fashion Show across the hall. $1 costume jewelry to $400 rhinestone cowboy boots that my friend Helen deeply coveted. OK, back to CHA!

I got to make a canvas banner with my favorite Creating Keepsakes designer Mou Saha. She's so sweet and humble. I haven't played with the Faber Castell gelatos before so that was neat too. It's like lipstick that you rub on your medium and then blend it in with a water pen.

Melissa Francis had adorable creations all over ... like these sweet scenes under glass.

Modern and vintage at the same time. Love it!

More Studio Calico inspiration (there was so much of it!!) in shadow box frames.

Lovely pop-up cards.

Me and my tired body leaving the show.

Also note that today I have a sweater on. After 25 years of going to events at the Rosement Convention Center, I should have known that it's about as cold as the Arctic Circle during the summer. I always think of how much money they could save in that enormous space, and how many people would be so much more comfortable, if they would just take it easy on the air conditioning.

Anyway, thanks for taking a look ... I'm so ready to sit and play!

PS. I'm so excited about the Spectrum Noir alcohol markers that we got to play with at a class. They come in packs of 6 and retail for $12. Each pack is a color family (like reds) and there are 12 color families in the basic set. What got me is the price ... at only $2 per marker, they are much cheaper than their competitor. I am so glad I held out for so long, now I finally have blending alcohol markers at a reasonable price. I've since read reviews that they might not blend as well as the Copics, and that the rigid nib is not as good to work with as Copic's brush. But for what I'm needing them for I think it will be OK. If anyone has any experience with these let me know your thoughts. I think part of it is having the right paper so it doesn't bleed.