Saturday, April 28, 2012

Square Fibers Card [LIM #65]

Square Fiber You're a Treasure Card

A simple card for the Less Is More #65 challenge sketch.


I have WAY too many fibers that don't get the love they deserve, so I thought it was time to put them to good use. I like how the fibers are the focus of this card, and not an embellishment like they usually are. Just a simple stitching, and weaving a banner through for the sentiment.

Square Fiber Birthday You're a Treasure Card

Thanks for looking!

Supplies used:
PTI Double Ended Banner Die
PTI Dress Form Sentiment Stamp
Fibers

April Showers Pop-up Card [CFC #50]

April Showers Bring May Flowers PTI Sliders Die Card


Here's a fun birthday card for all those April birthdays ... something to keep them going just a little longer until sun and fun!

It's inspired by Casual Friday's challenge to create something with the theme April Showers Bring May Flowers and uses Papertrey Ink's Movers and Shakers: Sliders die to get the pop-up effect. Love that the umbrella ends up "covering" the flowers and card.

April Showers PTI Sliders Die Card 

This is what the card looks like before you pull on the white circle tab. The letters I did with a souffle pen, which I love for being very intense and having a slight dimension to it. The umbrella I drew and then cut another one to use for a mask. Each section was cut apart for the mask, allowing me to stamp different designs on the umbrella. Outlined with the souffle pen. The umbrella handle is a toothpick that I rolled through the ink pad to color. A hole is punched on top of the umbrella for the pointy toothpick end to stick out.

April Showers and Flowers PTI Sliders Die Card

Then you pull on the "MAY" tab and out come the flowers, literally! Another mask over the sentiment area so the lettering will stand out.


PTI Movers and Shakers Sliders Die

This was a fun card to do! Thanks for looking.

Supplies used:
PTI Movers and Shakers Die: Sliders
PTI inks

AC and Martha Stewart Texture Stamps
Souffle pen
Toothpick

Wednesday, April 25, 2012

Vintage Fabric House Card [PTI Blog Hop]


Although I love vintage textiles, I've never been good at pulling off the shabby chic look. So this month's blog hop challenge from Papertrey is a challenge for me.

I broke down and took scissors to some of my vintage textile collection to make the house.


Vintage floral house newspaper door

The book page text for the trees and door is vintage too. I don't have any of the cool new tree stamps, but they're quick to cut on your own. I wrapped the tops of the trees on the back side of the card and liked how it look, so then I was stuck wishing I cut a full circle for the middle tree. Note for next time!


Newspaper trees

No room left for the sentiment, so ended up having it come out the chimney. 

Fun card for me, but quite the stretch!
Supplies used:
Vintage textiles
Vintage book pages
AC paper


Vintage floral fabric house trees card

Monday, April 23, 2012

Coffee Filter Flowers for Kids [CFC #49]

Coffe Filter Flower Punch Hi Card


Coffee filters make the best material for flowers, and are so quick and easy to do with kids of almost any age.


Coffee Filter Flower Step by Step Instructions 3

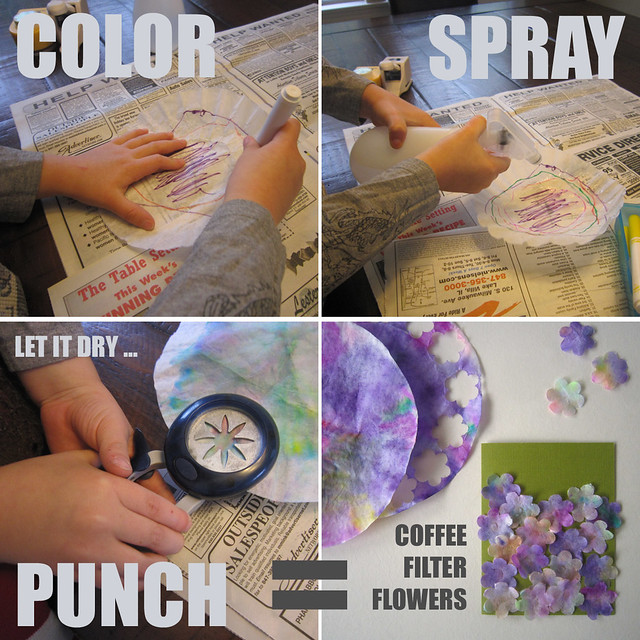
You'll want to cover your table or set this up outside. Gather several coffee filters, markers and a spray bottle. I found you can give the kids 2 or 3 coffee filters at a time, have them color the first layer, and when it's sprayed the colors will bleed to the rest of the filters in the stack. Good for younger kids whose attention span might only last for one round! My 4 year-old boy had fun for over an hour on this project. There is a little waiting involved after you spray the filters for it to dry ... otherwise the punch would tear the paper. Just have them work on another round of coloring and then your first set should be dry.

Another tip: the more they color, the richer the color saturation on the coffee filter, and the more time you have to get something else accomplished : ) Our first round of filters didn't have a lot of coloring (my son couldn't WAIT to use the spray bottle) so we ended up doing this again with marker covering most of the filter before spraying.

This would be a great project to do with a group of kids at a play date, or for a birthday party craft. No skill involved, quick and easy to do, and a $2 pack of filters will last you a lifetime.

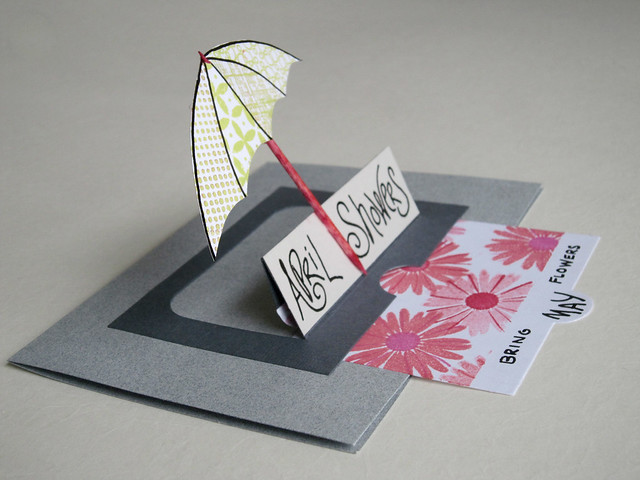
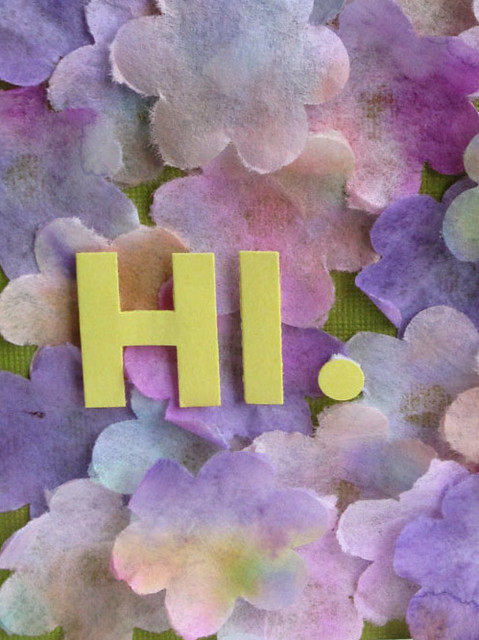
Anyway, back to the card.
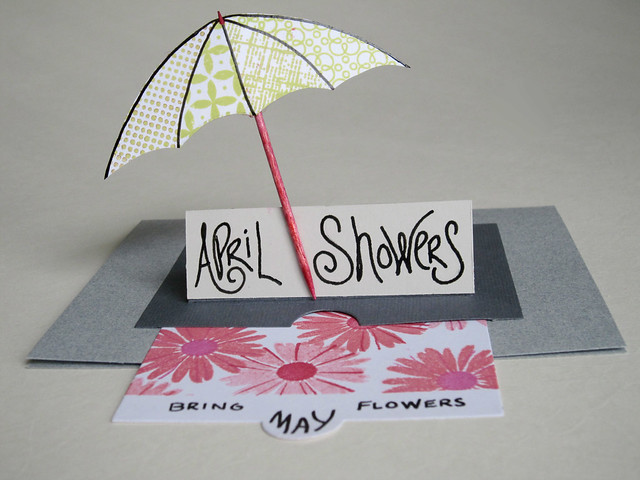
It's based on the CFC #49 sketch:


Coffe Filter Flower Punch Hi Card

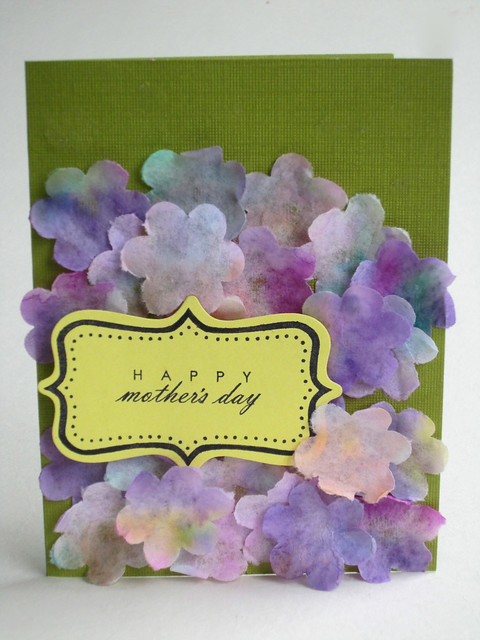
Your child could glue stick the flowers to the base for a card completely made by them. Would be great for a card to Grandma, especially for Mother's Day coming up. Just change the sentiment:

Coffe Filter Purple Flower Mothers Day Card


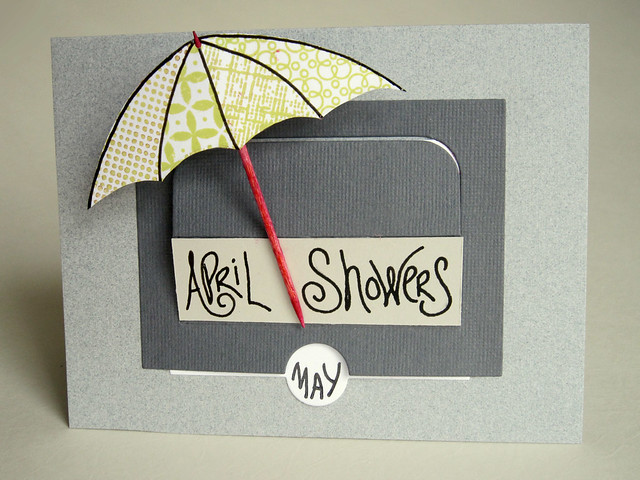
A few of the flowers are on pop dots to give it more dimension.

Coffe Filter Flower Punch Hi Card_edited-1

There's so much you could do with these coffee filter flowers. Cover a ball to make a party decoration, attach to a stem to stick in a vase, string to make a garland, cover a frame, I'm sure there are hundreds more ideas.


Coffee Filter 3D Layered Flower Gift Card_web 2


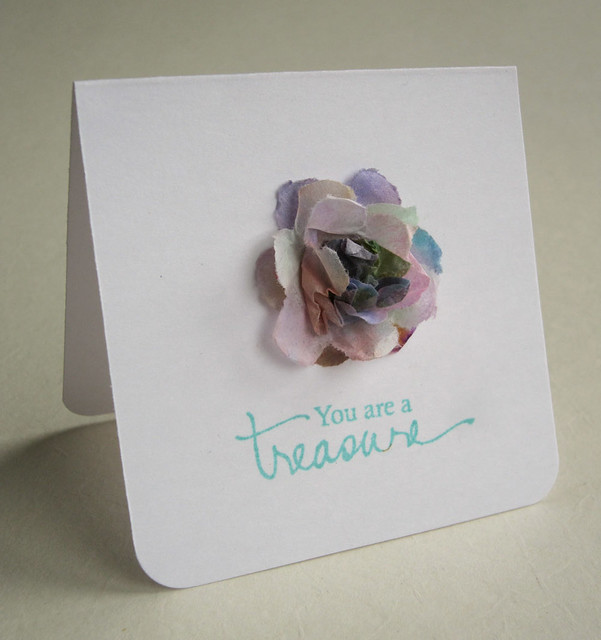
Here's a flower made from stacking four layers of flowers, attaching in the center with a brad, then crumpling the layers in the center.

Well, thanks for looking. I hope you give these a try, regardless if you have a child-artist at home or it's just you playing!

Supplies used:
McGill flower punch
Provo Craft garage sale letter dies
PTI dress form sentiment stamp
coffee filters


Linking up with:

See Vanessa Craft

Sunday, April 22, 2012

Love You a Latte Card [CFC #49]


Here's a "Love You a Latte" Mother's Day card for all those coffe-lovin' mommas. This card is based on the CAS-ual Fridays sketch challenge:


It's the first time I've used the Papertrey Heart-2-Heart die and stamp set. It's a smaller and cheaper set, but still fun to play with!


I cut a heart shape out of paper and then used the negative space as a mask for the dotted texture stamp. Then cut around the dotted heart leaving a white margin to set it off. Originally I used the negative shape as a mask to sponge ink, but the coffee cups didn't look too good on that blurred background. The graphic dotted background was much cleaner and better.


Here's another version, which I may like better. 


How fun to see what everyone does with the same sketch, love those challenges!

 
Thanks for looking!

Supplies used:
PTI Heart-2-Heart stamp and die set
PTI melon berry ink
PTI banner die
PTI bloom builders die (the dots from the center of the small flower)
AC texture stamp

Simple and Layered Dress Form Card [MIM #62]


I love seeing "before and afters" and this week's Papertrey Ink Challenge has a similar flavor. The challenge is to make a simple card, and then step it up to a more involved card using texture, dies, layers, elements. The background on the card above was masked over a ticket die so the ticket stamp could be featured.


For the stepped up card, it was fun to let loose with the elements (not something I'm used to, or comfortable with doing). The layers, swiss dots texture, dies, brads, and ombre floral arc make this card more involved than the first one, while retaining the same basic dress form and ticket design.


This was a fun challenge to do ... thanks for looking!

Supplies used:

PTI dress form die and stamp
PTI just the ticket die and stamp
PTI background basics stamp
American Crafts texture stamp
PTI simply chartreuse, melon berry, true black ink

PTI dress form die and stamp
PTI just the ticket die and stamp
PTI bloom builder die
PTI simply chartreuse, melon berry, true black ink
Martha Stewart border punch
Provo Craft swiss dots embossing folder
Leaf punch


Thursday, April 19, 2012

Ombre Mother's Day Card [CQC #133]


Love the Ombre trend going on now in fashion, home decor ... even food. Have you seen those incredible Ombre layered cakes all over Pinterest? This morning at a Mom's group meeting they mentioned Ombre hair (dark roots, lighter as you get to the end). So I thought it would be fun to do an Ombre Mother's Day card using the Color Q Challenge colors.


For the second mustard stripe I used the same mustard paper as the first stripe, but colored it with a gray Copic marker. Otherwise, I wouldn't have had two similar papers in that color family.


As long as we're being trendy ... how about some chevrons? I did the black stamped image first, and then shifted it up slightly to stamp the orange/rust colors. Also took out the circle from behind the "O"because it was a little much. Maybe later I will swap out M-O-M for D-A-D since the colors seem more masculine. We'll see : )

Thanks for looking!

Supplies:
- American Crafts chevron stamp
- Cuttlebug Garage Sale letter dies

Monday, April 16, 2012

Doodled Thank You Card [LIM #63, PDCC #127]


Doodling?!? How fun! I haven't done that since college! This is my first time participating in the Less is More challenge and was excited that it was on doodling. Although now that I am linking up to the challenge I'm realizing that it's for a one layer card, and I've doodled on different pieces of cardstock (the layer). Sorry, newbie mistake!

The colors from Play Date Cafe are so cheery and summery, perfect inspiration!


Here's a close-up to help show the dimension of the souffle pen (best seen on the red postage stamp).

Thanks for looking!

Supplies used:
PTI Postage Die
Heidi Swapp Stamp
Souffle Pen

Child of God


Lots of religious milestones for us this year. My older son is making his First Communion, and I have finally been initiated into our faith this Easter.

While my oldest son had the day off school on Good Friday, we took advantage and took off for Oak Park, IL (lots of incredible Frank Lloyd Wright architecture there!) At the end of our day hanging around the city we passed a church with a sign outside inviting people to come in and visit their Stations of the Cross. This was perfectly interactive for the kids ... you could touch the Crucifixion nails, the Crown of Thorns, and taste the salty tears (lettuce dipped in salt water). At the end you light a candle and place it at the foot of the cross. While kneeling, my youngest son spontaneously clasped his hands together in front of his face. It was a beautiful moment. He wanted to pray. So happy to have captured that, and love how the candlelight highlights his cheeks and still chubby hands. Even more special to me is knowing that we're finally on track with giving our kids a religious foundation.I'll always treasure this photo as a symbol of our milestones this year.

God Bless!


 Linking up with:

Hanging Fish Masculine Card

[this is a re-post ... something in Turkey kept viewing this page over and over so I deleted it and re-added it. Anyone else have that problem or know what it is? They never left a corresponding URL, just a large number of page views only on this post. Odd. Can't figure out what the purpose would be.]


We have a card exchange on Sunday and the theme is "guy cards." Fantastic! I'm always short of those. As I'm working on my guy card, I realize the reason I don't have many is because I don't enjoy making them as much ... no bling, no frills. But I push through, and end up with a fish card that I actually like. I rounded the top right corner of the card to mimic the lines of the "n", and "kissed" different patterns onto the fish.


And here's the inside. Simple, guy-like.

Inspiration comes from Papertrey's MIM Kissing Technique challenge, and CAS-ual Friday's challenge to use an image, a pattern (on the fish!), and a sentiment.

Thanks for looking!

Supplies:
PTI Think Big Favorites #1
Luxe Paper
AC Fish, Star and Textures Stamp
Martha Stewart Texture Stamp
Heidi Swapp Enjoy Stamp
Sizzix Die
Vintage Cotton String

Wednesday, April 11, 2012

Dimensional Flower Card [MIM #61 and RS #6]


This flower would be so fun to use for a birthday or baby shower present topper. And it's so easy to make.

Dimensional Paper Flower Petals

It's a combination of Dawn McVey's technique to create flowers with non-flower dies, and the Retrosketch layout challenge.


Just die cut a few of the Banner Border E and F cuts, glue the straight edge, and pinch them together. You can use your new petals as-is, or layer them like I did here. Then put some glue on a small punched circle, and lay that on top of all the petals so they stay together as a flower. Burlap and another small circle punch on top complete the center.

3D Paper Flower Card_edited-1

It really couldn't get any easier. Thanks for looking!

Supplies:
- PTI Banner Builder Dies
- PTI Leafy Vine Border Die
- PTI cardstock
- PTI Think Big Favorites #1
- Burlap
- American Crafts Texture Stamp

Linking up to:
 UndertheTableandDreaming

Monday, April 9, 2012

Sunflower Happy Birthday [MIM #61]

Sunflower Birthday Card PTI Vine Border Die

I was ready for a challenge today, but was initially stuck when I read the PTI challenge to make a flower using leaf dies. No leaf dies in my collection! So I ended up using the Vine Border Die, and thought it was going to have to pass for a sunflower.

PTI Leafy Vine Border Die

Bending between each leaf and then adhering the strip behind the brown circle was all it took.

Thanks for looking!

Supplies:
PTI Just the Ticket Stamp Set
PTI Leafy Vine Border Die
PTI Circle Die
Cuttlebug Swiss Dots Embossing Folder
PTI Spring Moss Ink
ColorBox Dark Brown and Chestnut Roan Ink
Bamboo Skewer